
Battling High Temperatures and High Prices
As we begin to focus our efforts on the bathroom walls, shower pan, etc. we’re still continuing our InSoFast ceiling tile install. But this time of year Texas weather means most days are well above 95 degrees and LocTite adhesive isn’t going to work as intended at those temps. The instructions recommend only using LocTite between 50 and 90 F and that means getting up early every day or two and putting up another ceiling row before temperatures rise.
Next, due to COVID-19, there’s been a lumber shortage and outrageous prices, so we’ve been putting off purchasing lumber and some other supplies until we’re ready to continue or the prices have come down a little.
Only a few months ago the wife and I took the truck up to Lowes to pick up ten 4’x8′ sheets of 23/32″ tongue and groove sub-floor. We left with only 4. Not because there was a shortage but because they were $86 each!
Yesterday, 9/4, we went back for more and found the prices were down to $48. Not pre-COVID prices but we’ll take it, so we got the remaining 6 sheets.
More Floor Panels
With the InSoFast wall panels installed, a 4’x8′ sheet of plywood needs to be cut down to just under 88 inches. It may be a 8’x40′ shipping container, but that’s the outside dimensions.
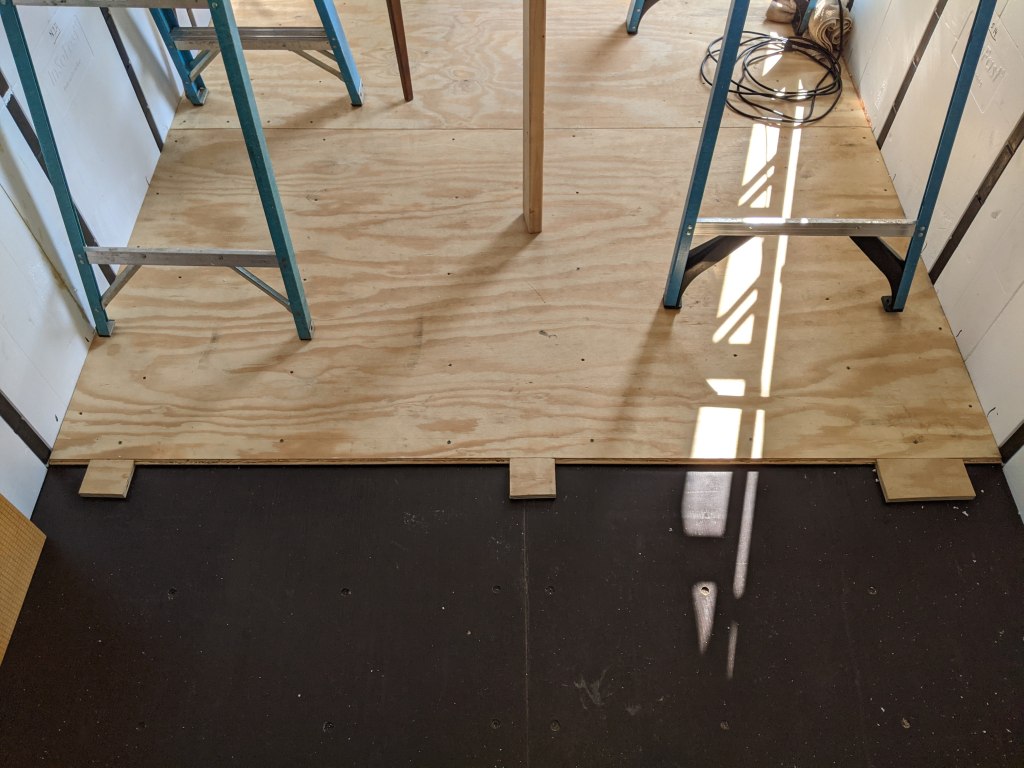
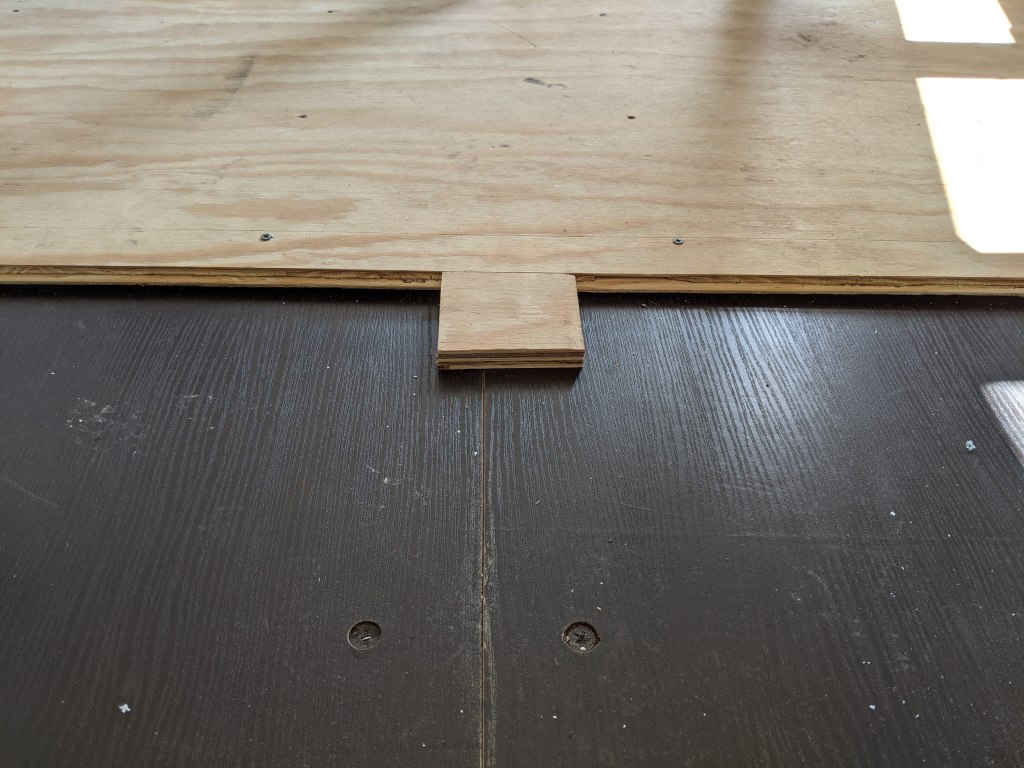
You may notice the small blocks. Similar to the problem with the ceiling tiles getting too compressed we need something of a “dry-fit” row to make sure the next row, or floor panel, will line up tongues and grooves next time. When screws are too close to the edge and really cranked down, you take a chance of compressing the tongue just enough to miss-align the next panel.
Shower Walls are Next
And that means ceiling prep. What?!?
Well, walls do connect with the ceilings, do they not? And since we’re planning on doing Pre-finished tongue and groove panels from Ready Pine, installed longitudinally, we can’t install them on the existing InSoFast ceiling panel plastic studs that ALSO run longitudinally.
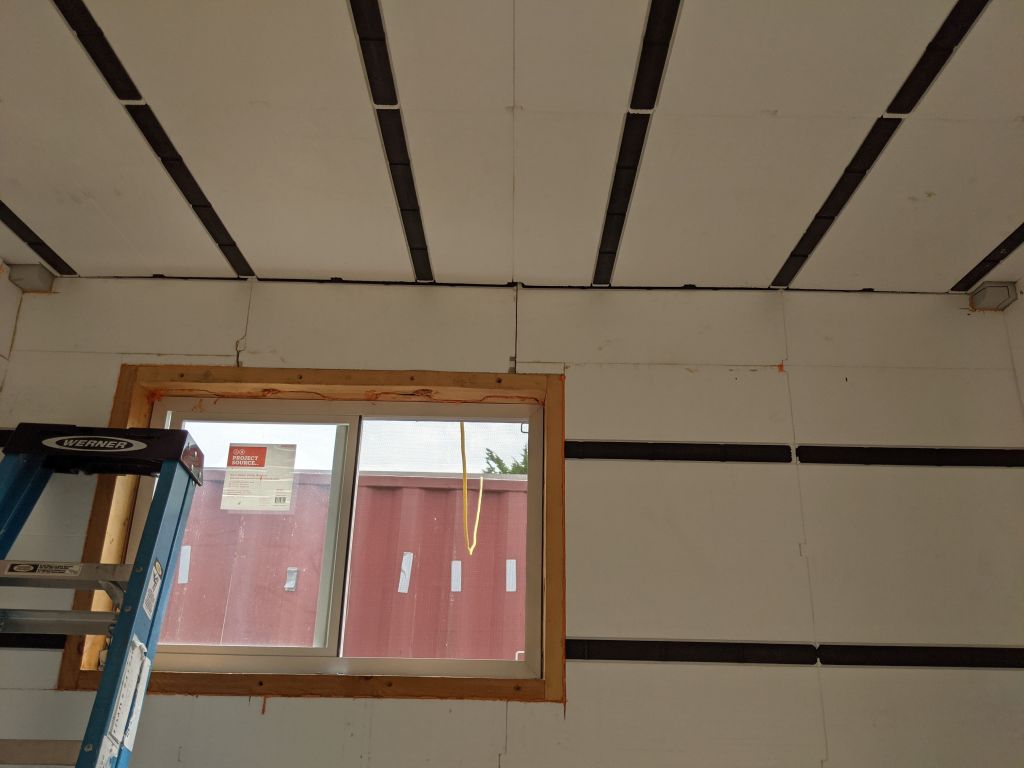
Plus, as promised back in August, we have an ingenious way to run our electrical wiring that requires something of a drop ceiling. By installing 2″x2″ horizontal “ribs” we’ll get this spacing and a way to mount tongue and groove Ready Pine!

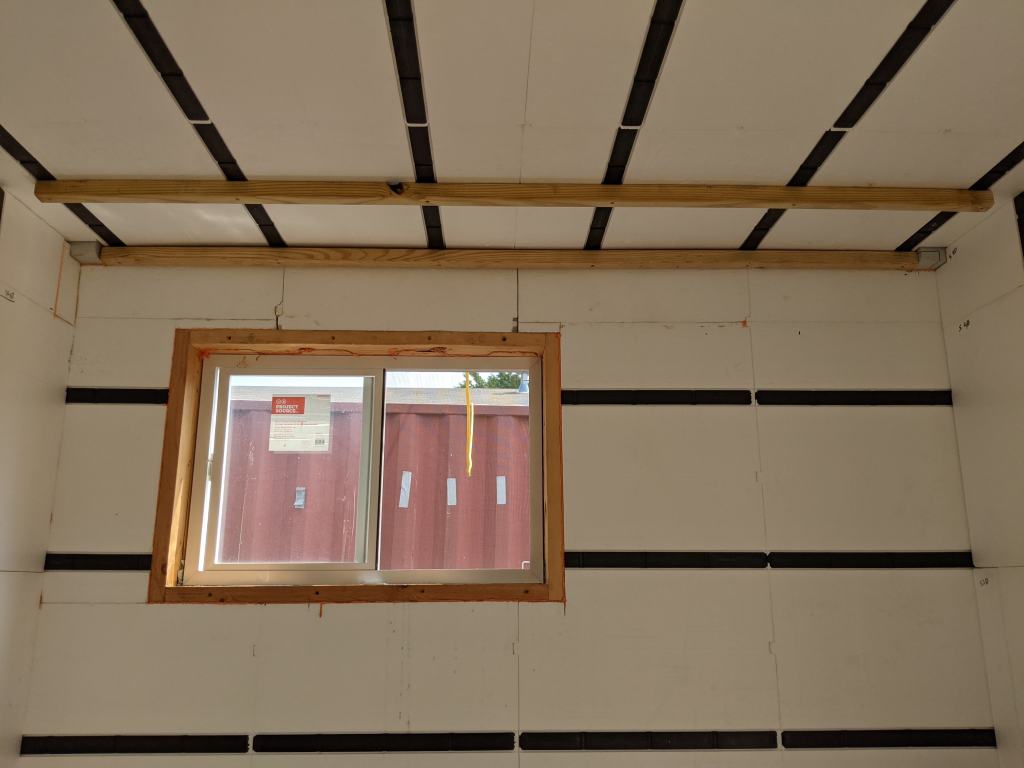
See that gap on the outside edge? Guess where the wires are going?
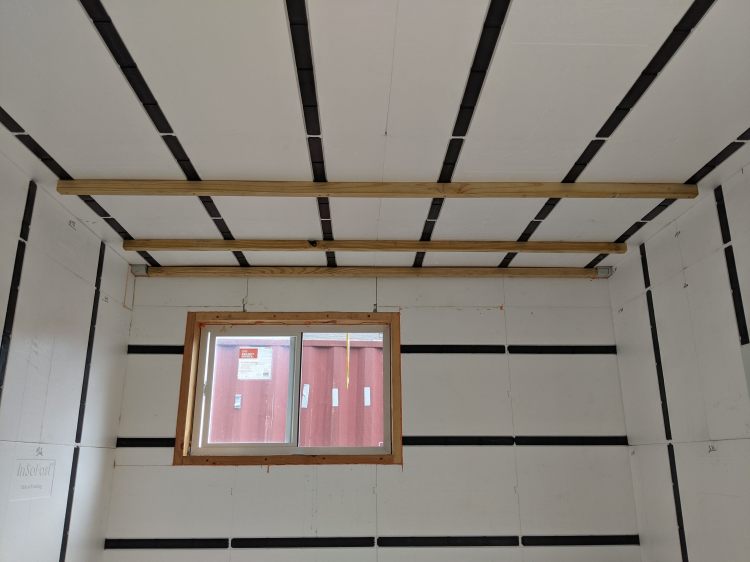
You may also notice these ceiling “ribs” are aligned with the vertical “studs” on the walls

Using this configuration allows us the freedom to run wires down either side of the container and even add more home runs to the breaker box at later dates as needed.
But wait, there’s more. These slots will hold more than just conduit for wiring. More on that in a future article. Stay Tuned!!!!
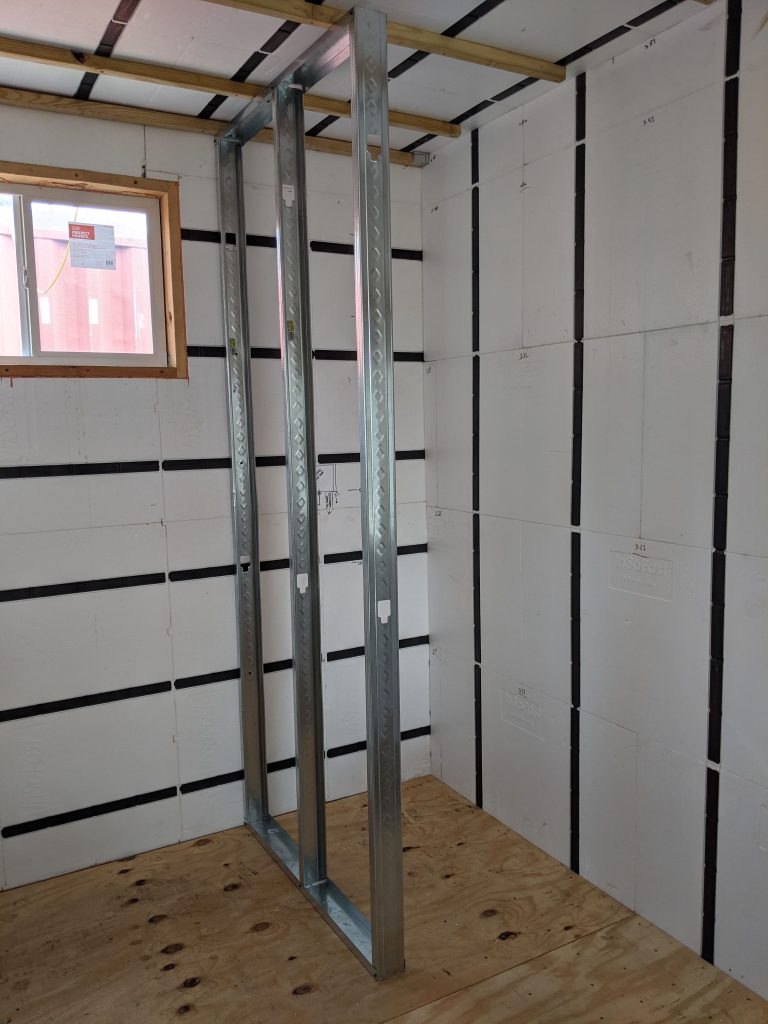
NOW, we can start on the Wall Bits
First wall bottom track
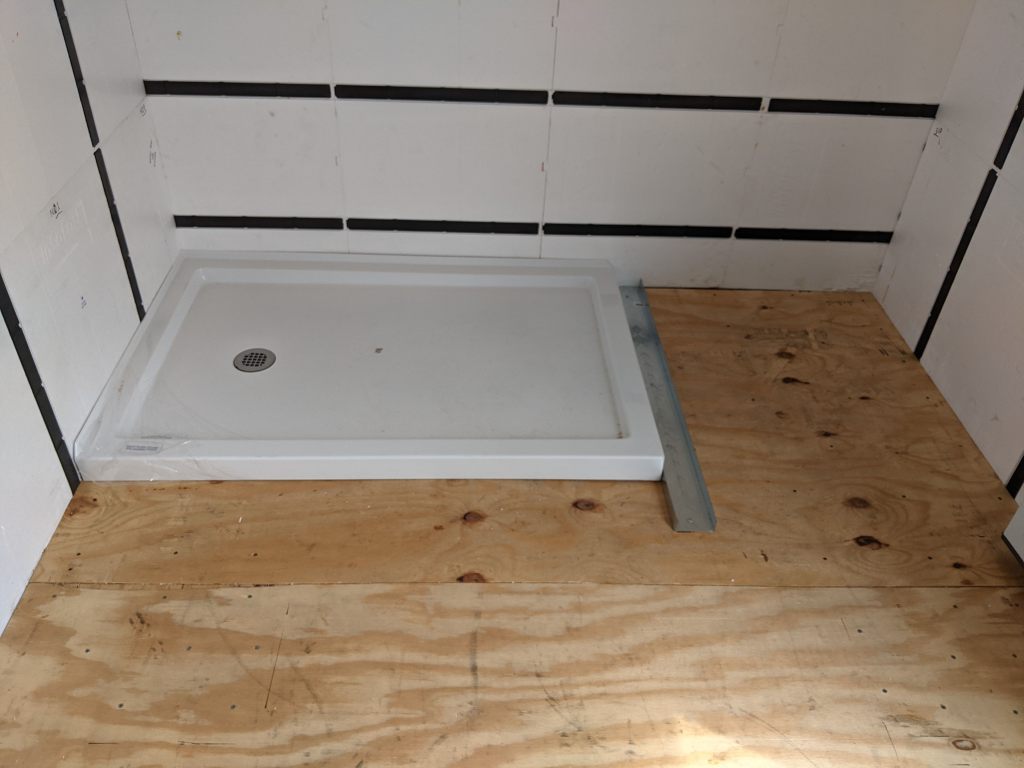
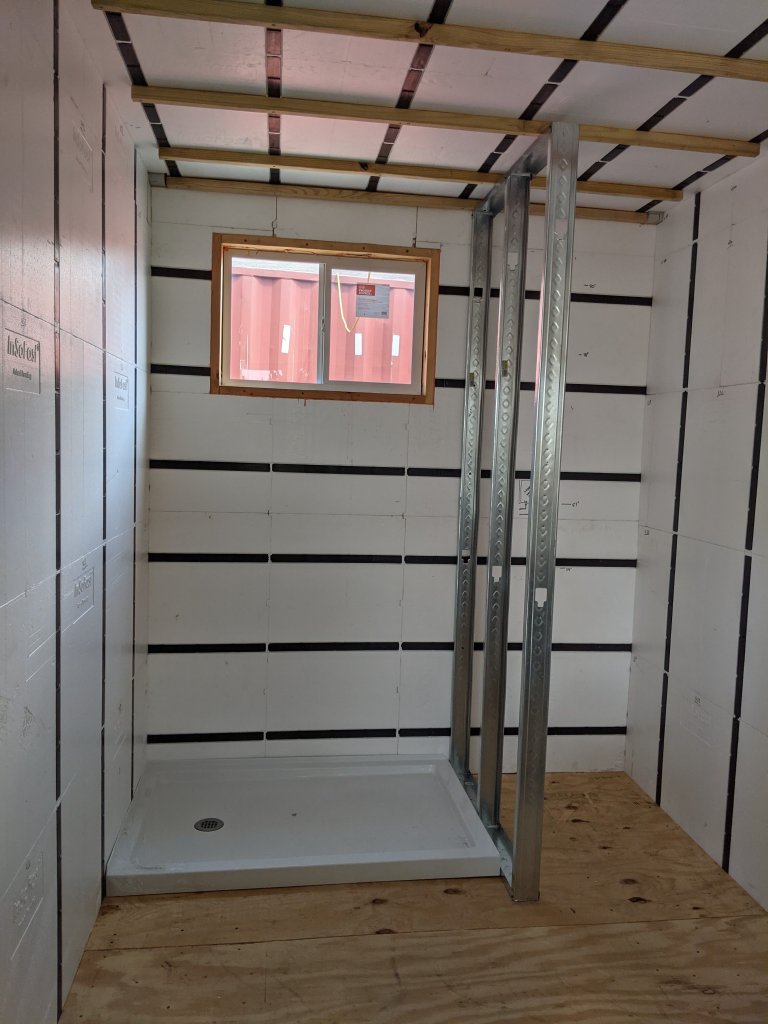
And with the shower pan put back. When everything’s ready we’ll mix up some mortar and permanently install the shower pan.
The area to the right of the shower will house the stacked, but full-size, front-loading, washer and dryer units. We even have a pretty cool way to get the dryer up to a shelf so it doesn’t sit directly on the washer.
Solar Panel Update
They’ve arrived! All 1200 pounds worth. Our refurbished solar panels arrived at the warehouse and they fork-lifted them on a pallet into the truck. The great people over at San-Tan Solar saw that I wanted to order 24 panels so they emailed and asked me to call them. Turns out I was only one panel away from saving a little money. For one more panel I was able to order a full pallet and get a $5 discount off each panel.

Originally $50, the price before tax and shipping was only $1,125! Yes they’re 250watt panels but we just got 25 for the price of four 340watt panels at $300 each. And we would’ve only gotten 1,360watts of power for the price while this setup we get 6,000watts!
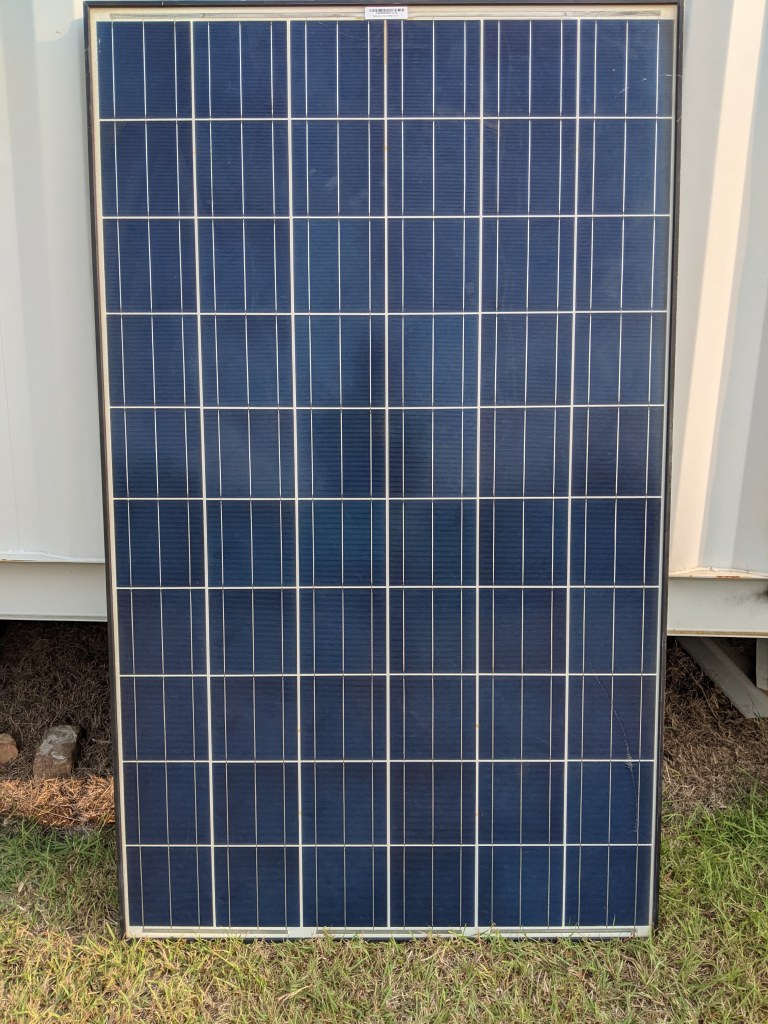
The “Snail-Trails” that made these used panels so cheap are hardly noticeable, even up close. Once on the roof, they won’t be visible. And they work great too.
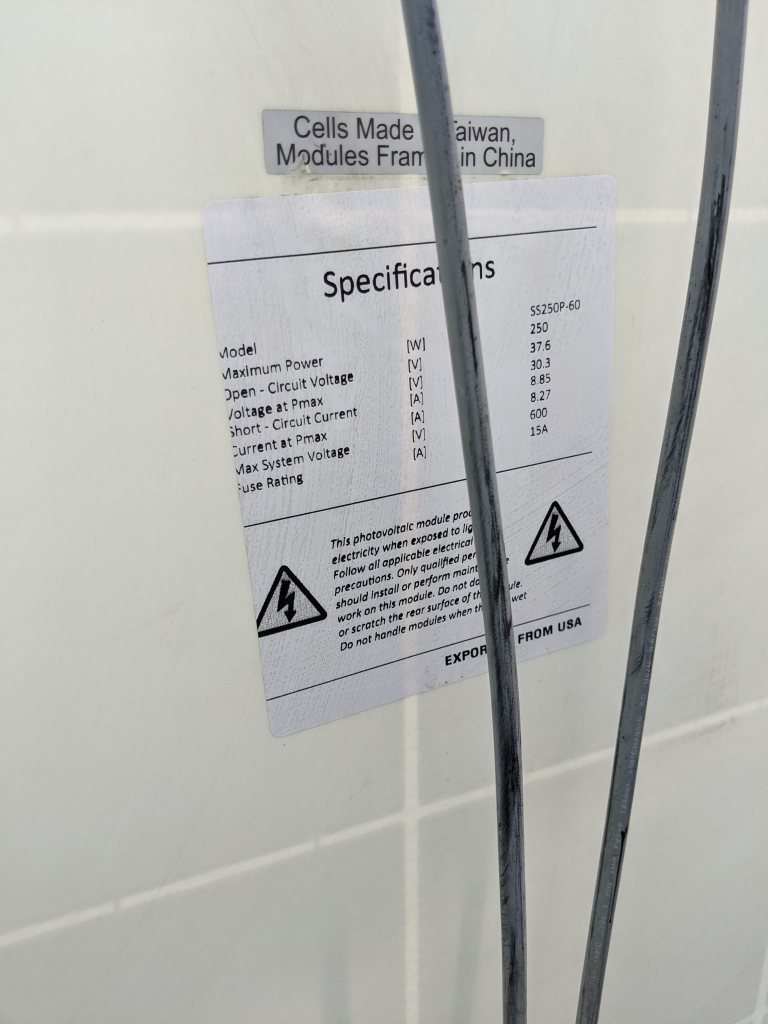
We tested a few and they’re all showing good numbers even after sitting in the hot 95 degree heat of the day. The panels got to 140 degrees and were still within 90% of the specs on their labels.
Who says going “Solar” is only for the rich?
While most commercial, professionally installed, and DIY for that matter, solar panel and battery systems pay for themselves in 10 to 15 years, we estimate these will be paid off in around 2 to 3. Maybe sooner.
See y’all next month!
