Code, code, and more code
As like anything else there’s usually a building code that needs to be followed when building a home. And there’s usually a good reason behind these codes. Even if you live in an unincorporated part of the county that doesn’t require inspections for what you’re doing AND you plan on doing most everything yourself. It doesn’t hurt to review the applicable building codes because they might just save you a lot of re-work from mistakes.
Most of your county’s building codes can be found online and there are lots of resources you can refer to as well. Remember, you’re probably not the first person to have that particular question. Just be persistent and search far and wide. Be sure to find YOUR state & county codes. Not all building codes are the same state to state.
Lastly, when in doubt, call or visit your county Building Department and get the facts right from the horse’s mouth. That’s what they’re there for.
Starting the Plumbing
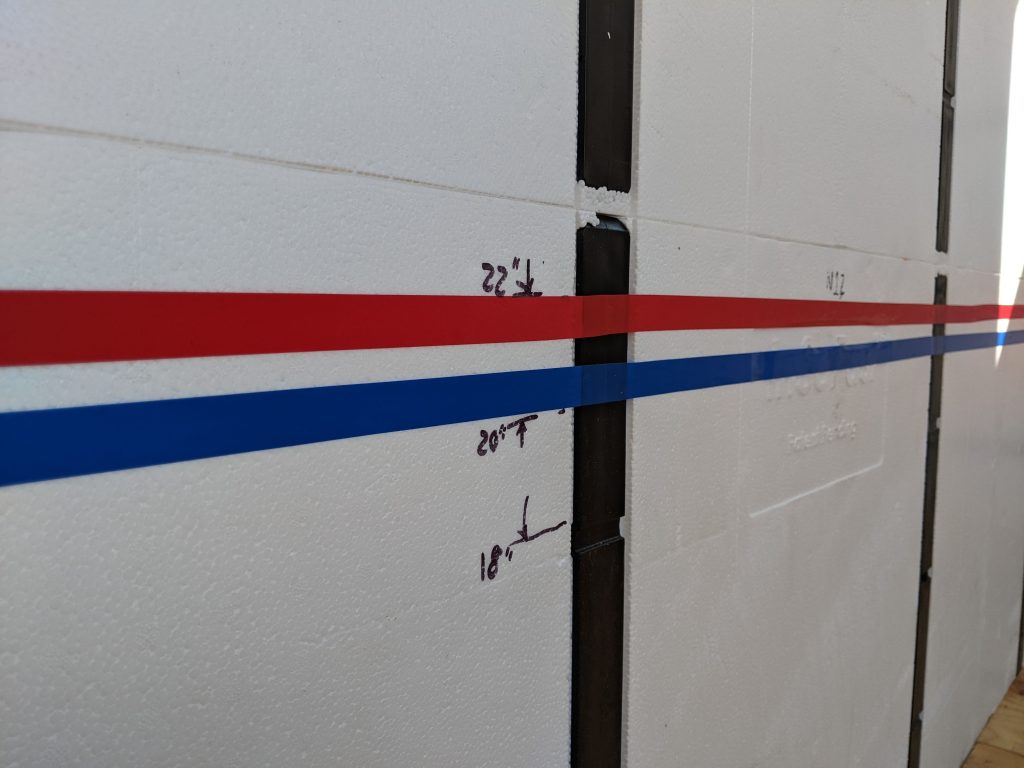
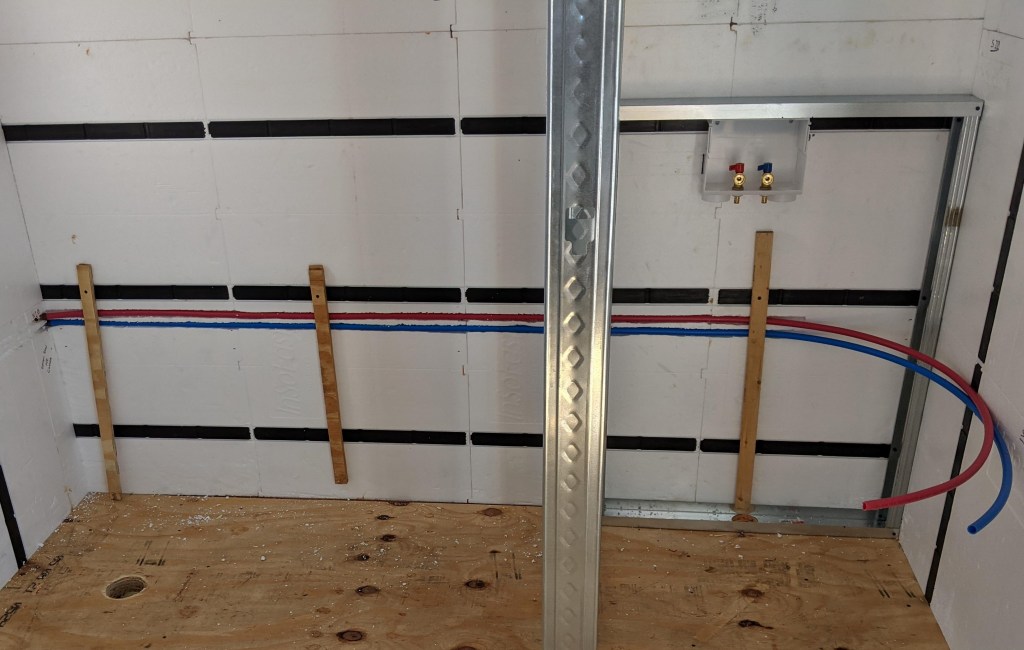
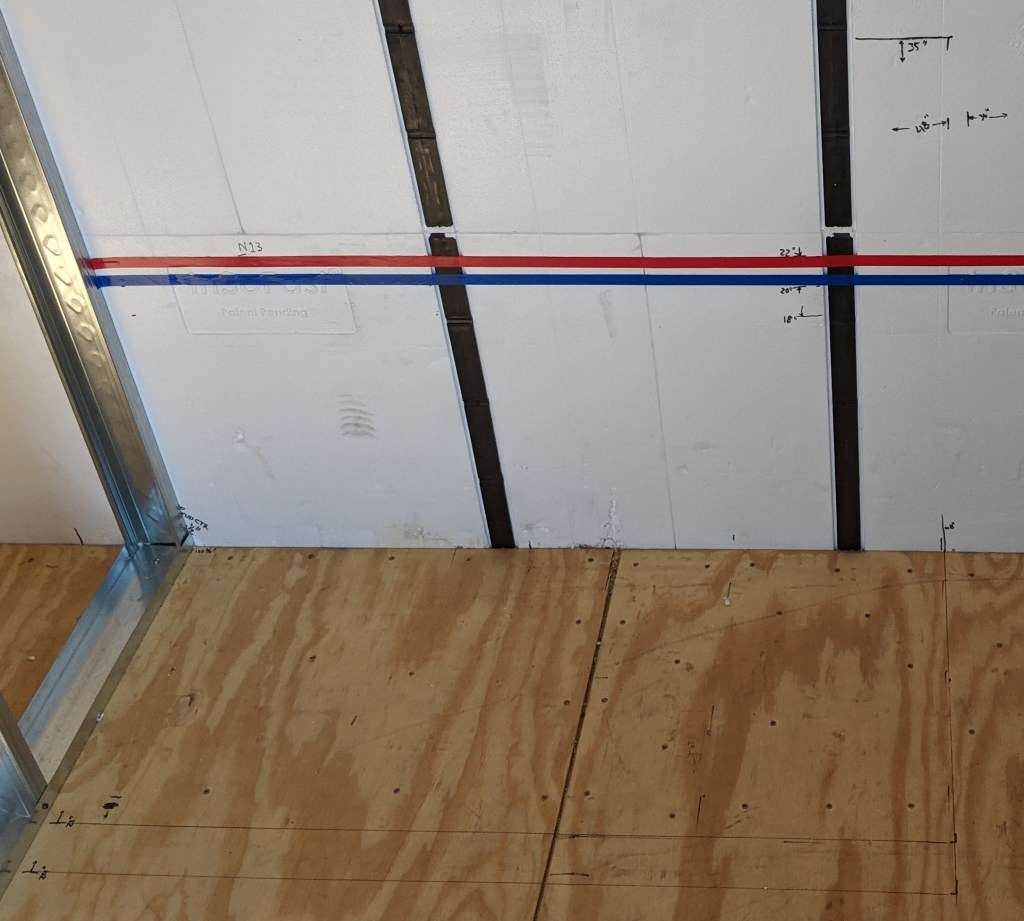
First things first: Map out all of your hot and cold runs as well as any supply and blended lines, like those from a shower mixing valve, for the entire structure. Use colored electrical tape (like white=supply, red=hot, blue=cold, purple=blended, etc.) to to differentiate and for ease of removal.

Most water valves are located between 20″ and 22″ from the top of the floor and most drain pipes are located approximately 18″ to 20″ from the floor. By running most of your water and drain lines in this height range you can remember to avoid this area when screwing or nailing any wall cladding to your “studs”.
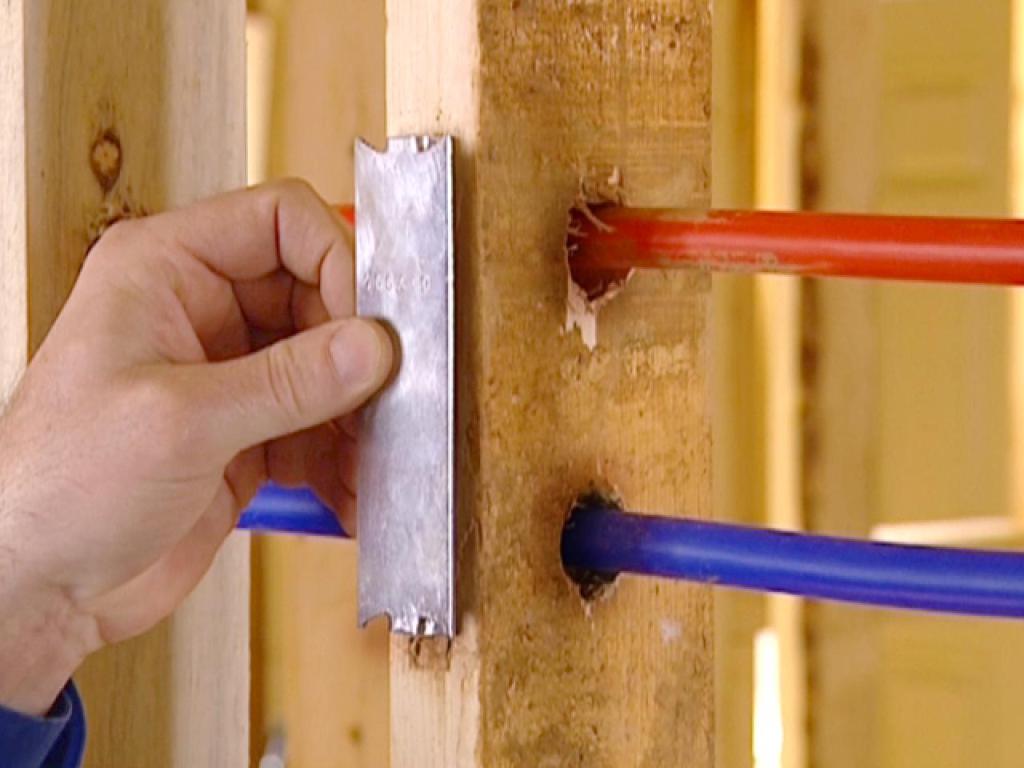
Where you can’t, or when you just want to be extra safe, be sure to install stud guards or stud shoes in front of your piping.
Pex-A vs Pex-B
There are advantages and disadvantages to each, do your research, but we opted for PEX-B, or also known as just plain “PEX”, for cost and convenience reasons.
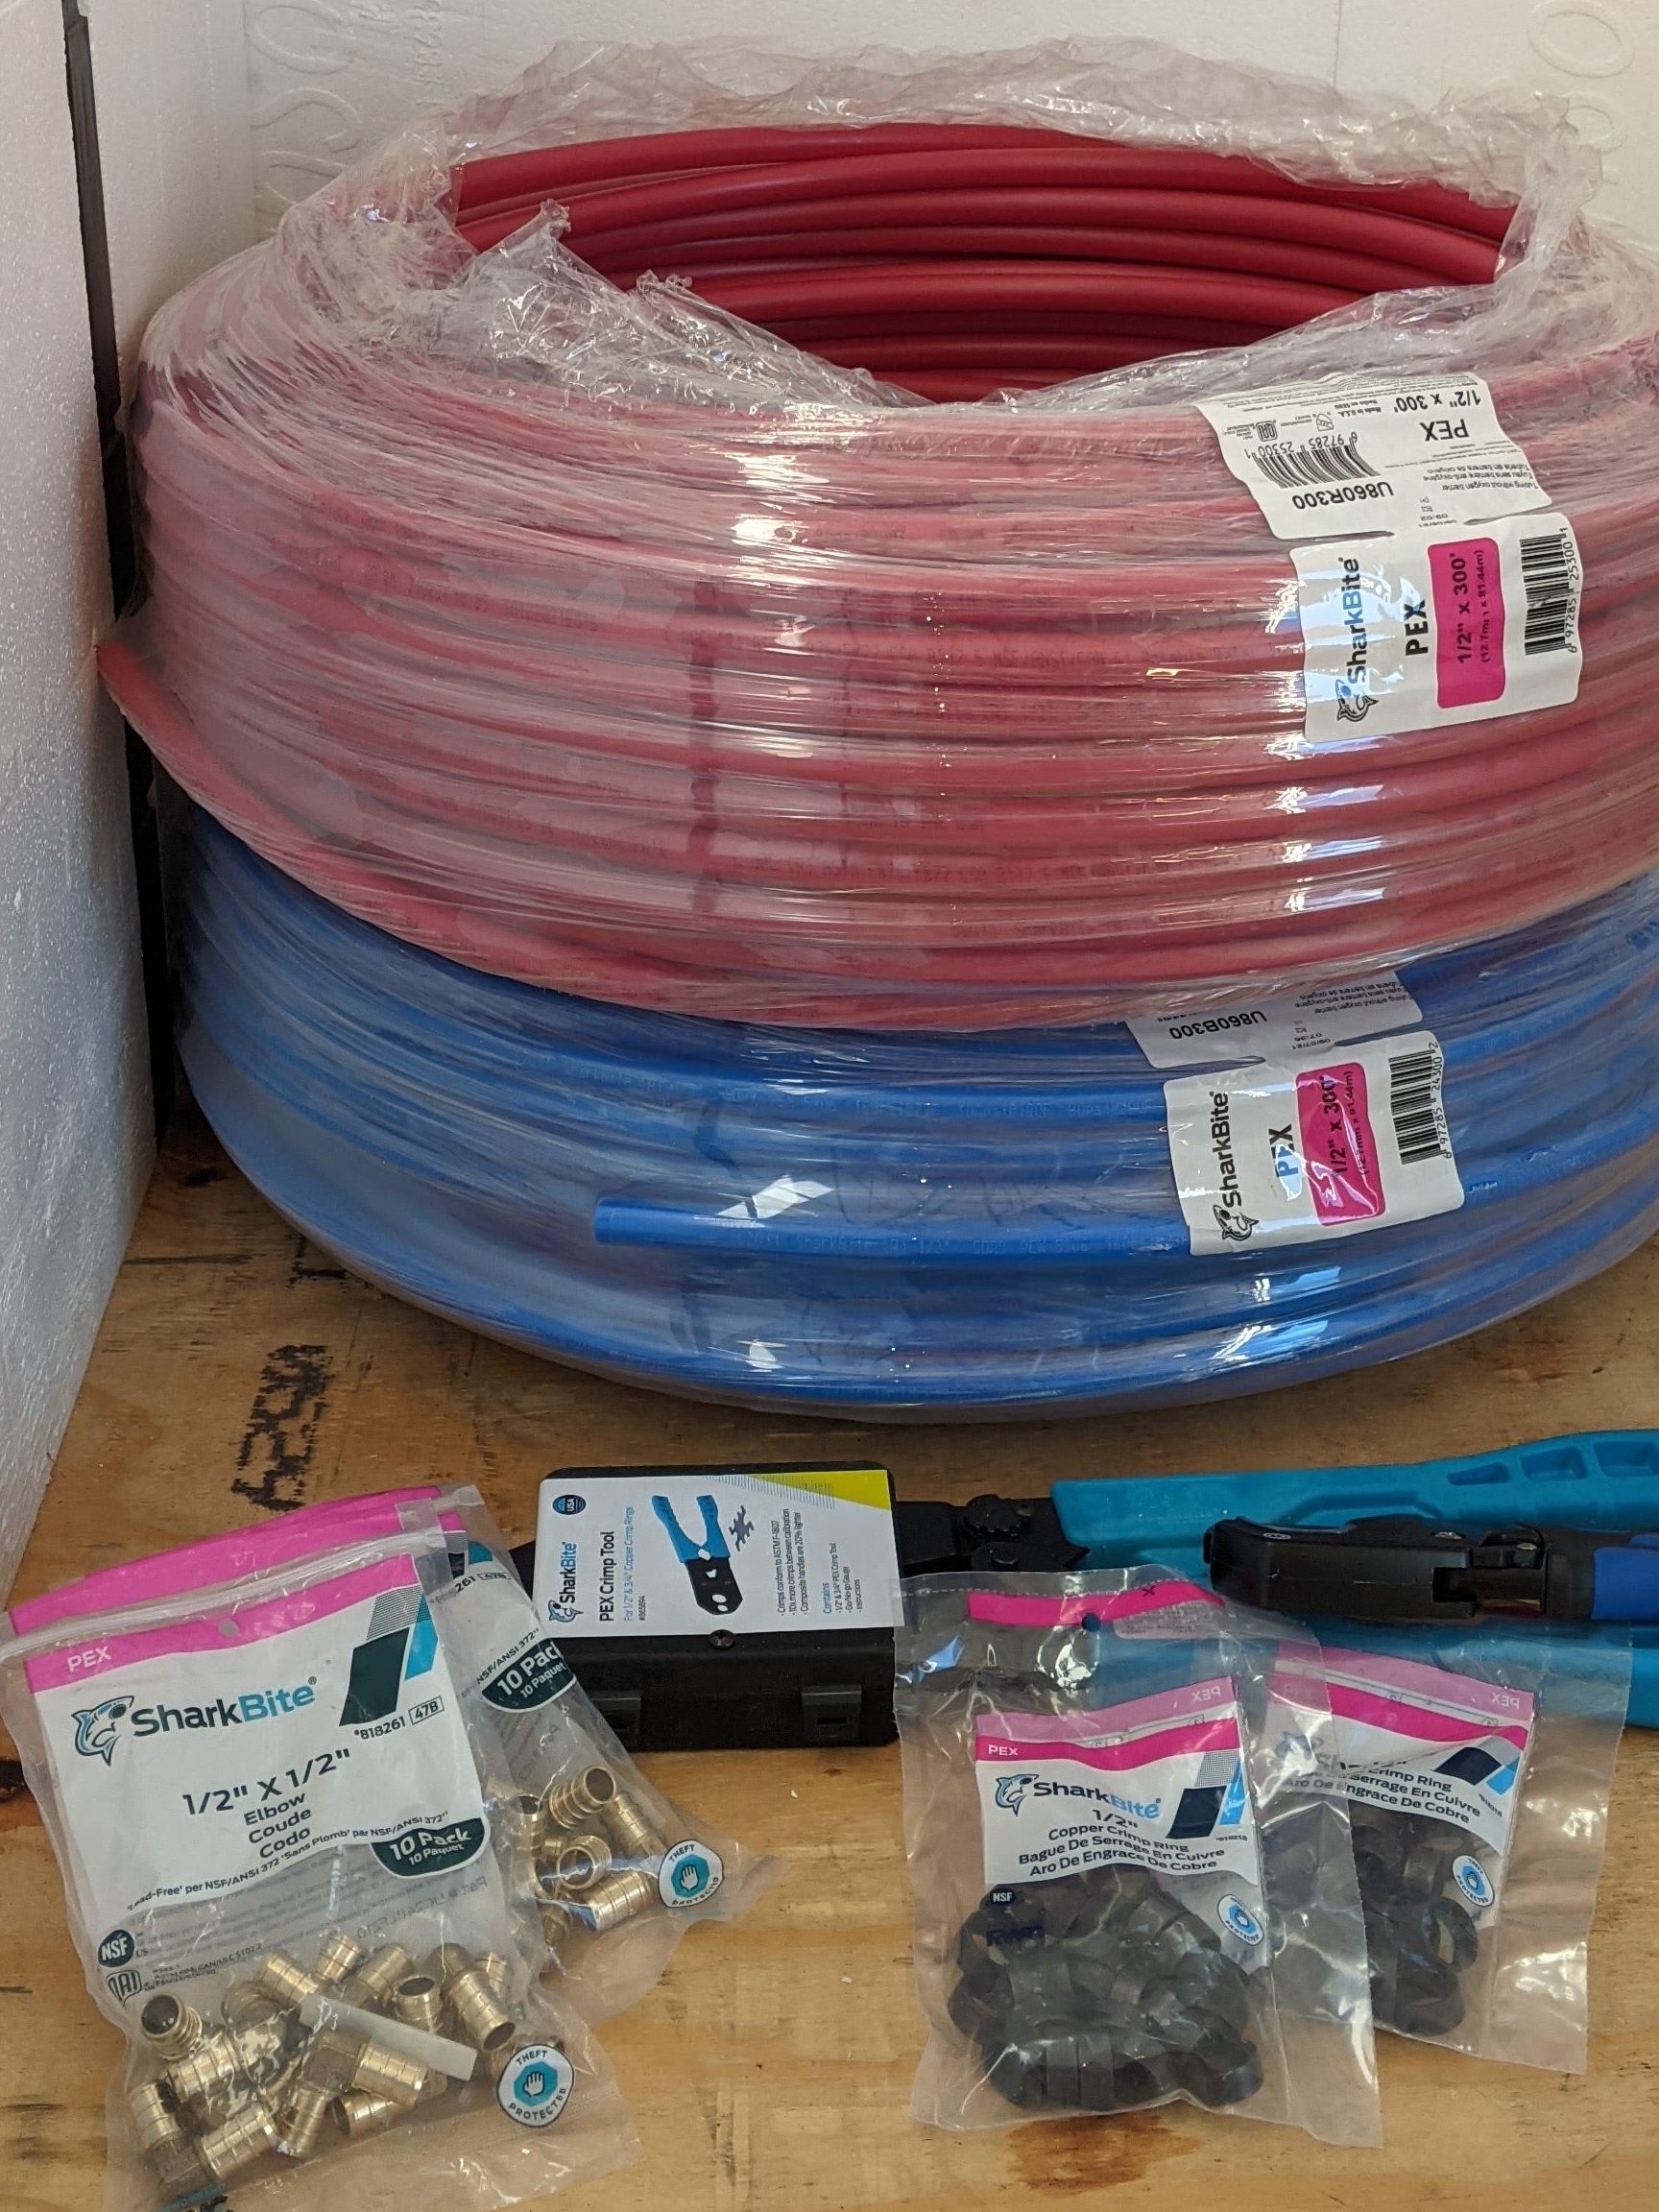
Pex-B can use various connector types but the most “tried and true” are crimp or clamp type where a copper band (crimp) or metal sliding ring (clamp) are squeezed using a very specific Crimp or Clamp tool at connector or fixture. Running two water lines (one hot, one cold) for each fixture in your home will save on connectors but will cost you more in piping. There are other advantages and disadvantages to using this “home-run” technique, including not wasting water, but we opted for trunk-and-branch since our runs are short and space is limited. More on each technique below.
Trunk-and-branch vs Home-run
Advantages of trunk & branch systems:
- Less total tubing required
- Higher water pressure during single-fixture use
- Easier to install in most retrofit applications
Advantages of home-run systems:
- No fittings usually needed between manifold and fixtures (which speeds up installation and reduces the likelihood for leaks)
- Ability to have centrally-located shut-off valves for each line
- More balanced water pressure when multiple fixtures run
- Shorter wait time for hot water in non-recirculating systems
And now there’s a third choice…Logic Plumbing
Check out this article from Plumbing Perspective on a thorough description and explanation. https://plumbingperspective.com/why-logic-plumbing-beats-home-run-and-trunk-and-branch

Water Distribution and Drains
With space being at a premium it helps to plan out everything in advance. You know the old saying, “Measure once, cut twice”. So when you’ve got to pack it in, plan it all out first. Chances are, between building code requirements and location or convenience, you’ll find you’ll have to make some compromises.
Most websites and YouTube videos advise mapping out all of your drains first because they usually have the strictest building codes to follow. Plus, they’re usually the most bulky and are hard to put in after everything else has been run.
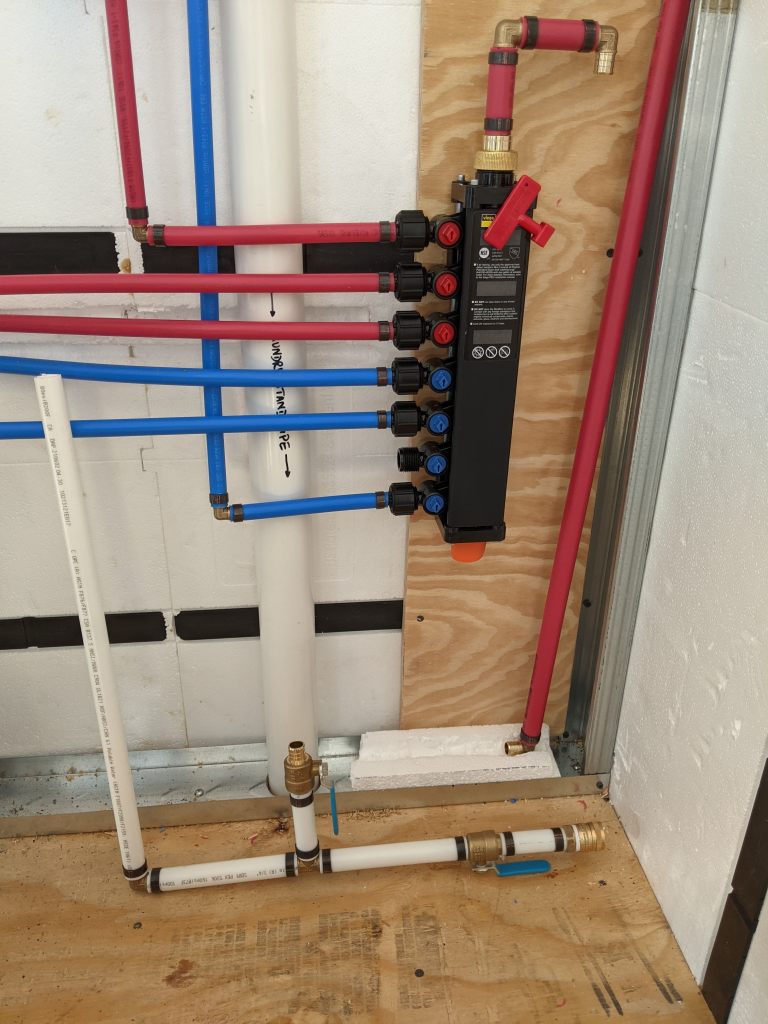
In our case, we opted to build out a “box” where the washing machine valves and stand pipe drain could go along with our hot and cold water manifold. This would be where everything comes together. The main water line and on-demand hot water heater would be mounted on the opposite side of this wall just outside.
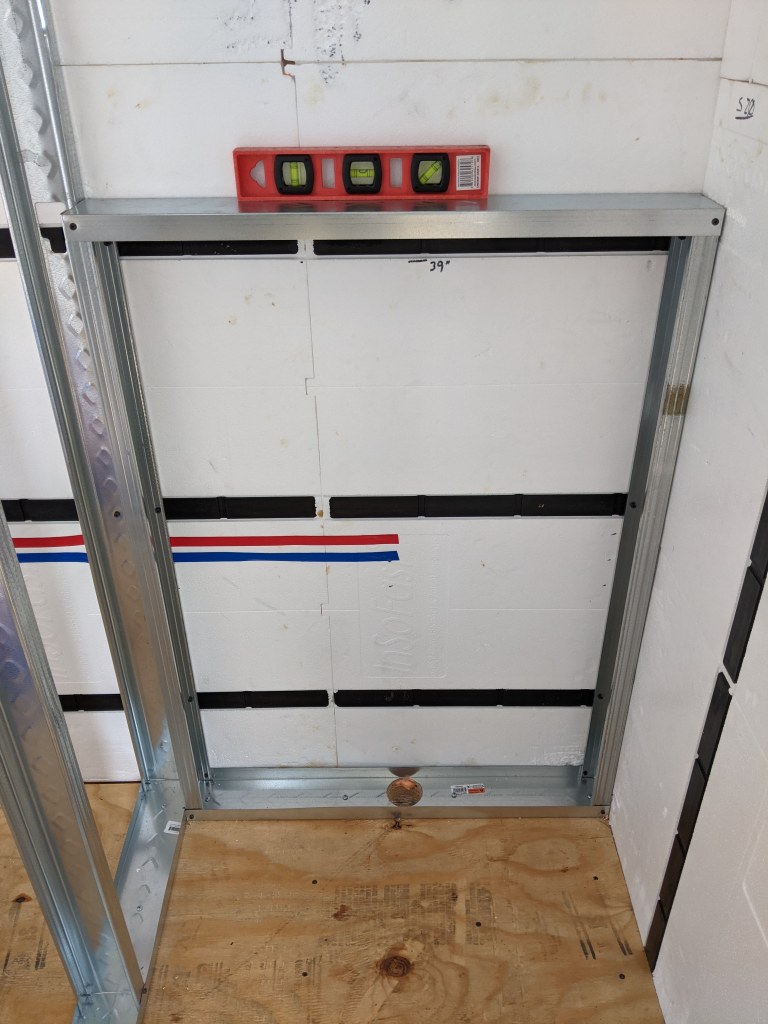
Code now requires a 2-inch stand pipe because new washing machines push out a lot of water very, very quickly. Dry fit everything, constantly, before installing it permanently! You may even want to wait to do the permanent things, like gluing or hole cutting, until you have EVERYTHING laid out. Create your cuts and holes first only when you have no other place(s) to put them and you’ve planned where everything is going in around them. Then make everything else work around those items with the strictest constraints. With that said, it doesn’t hurt to draw lines or circles on the walls and create a “stand-in” part like a 2×4 or a chunk of PVC pipe instead of cutting the hole. There’s a good chance you’re going to want to move it later.
Embedding water lines in InSoFast

InSoFast insulation panels have plastic “studs” with holes in them just for this purpose. So familiarize yourself with these pass-thru locations and plan to use them whenever possible.

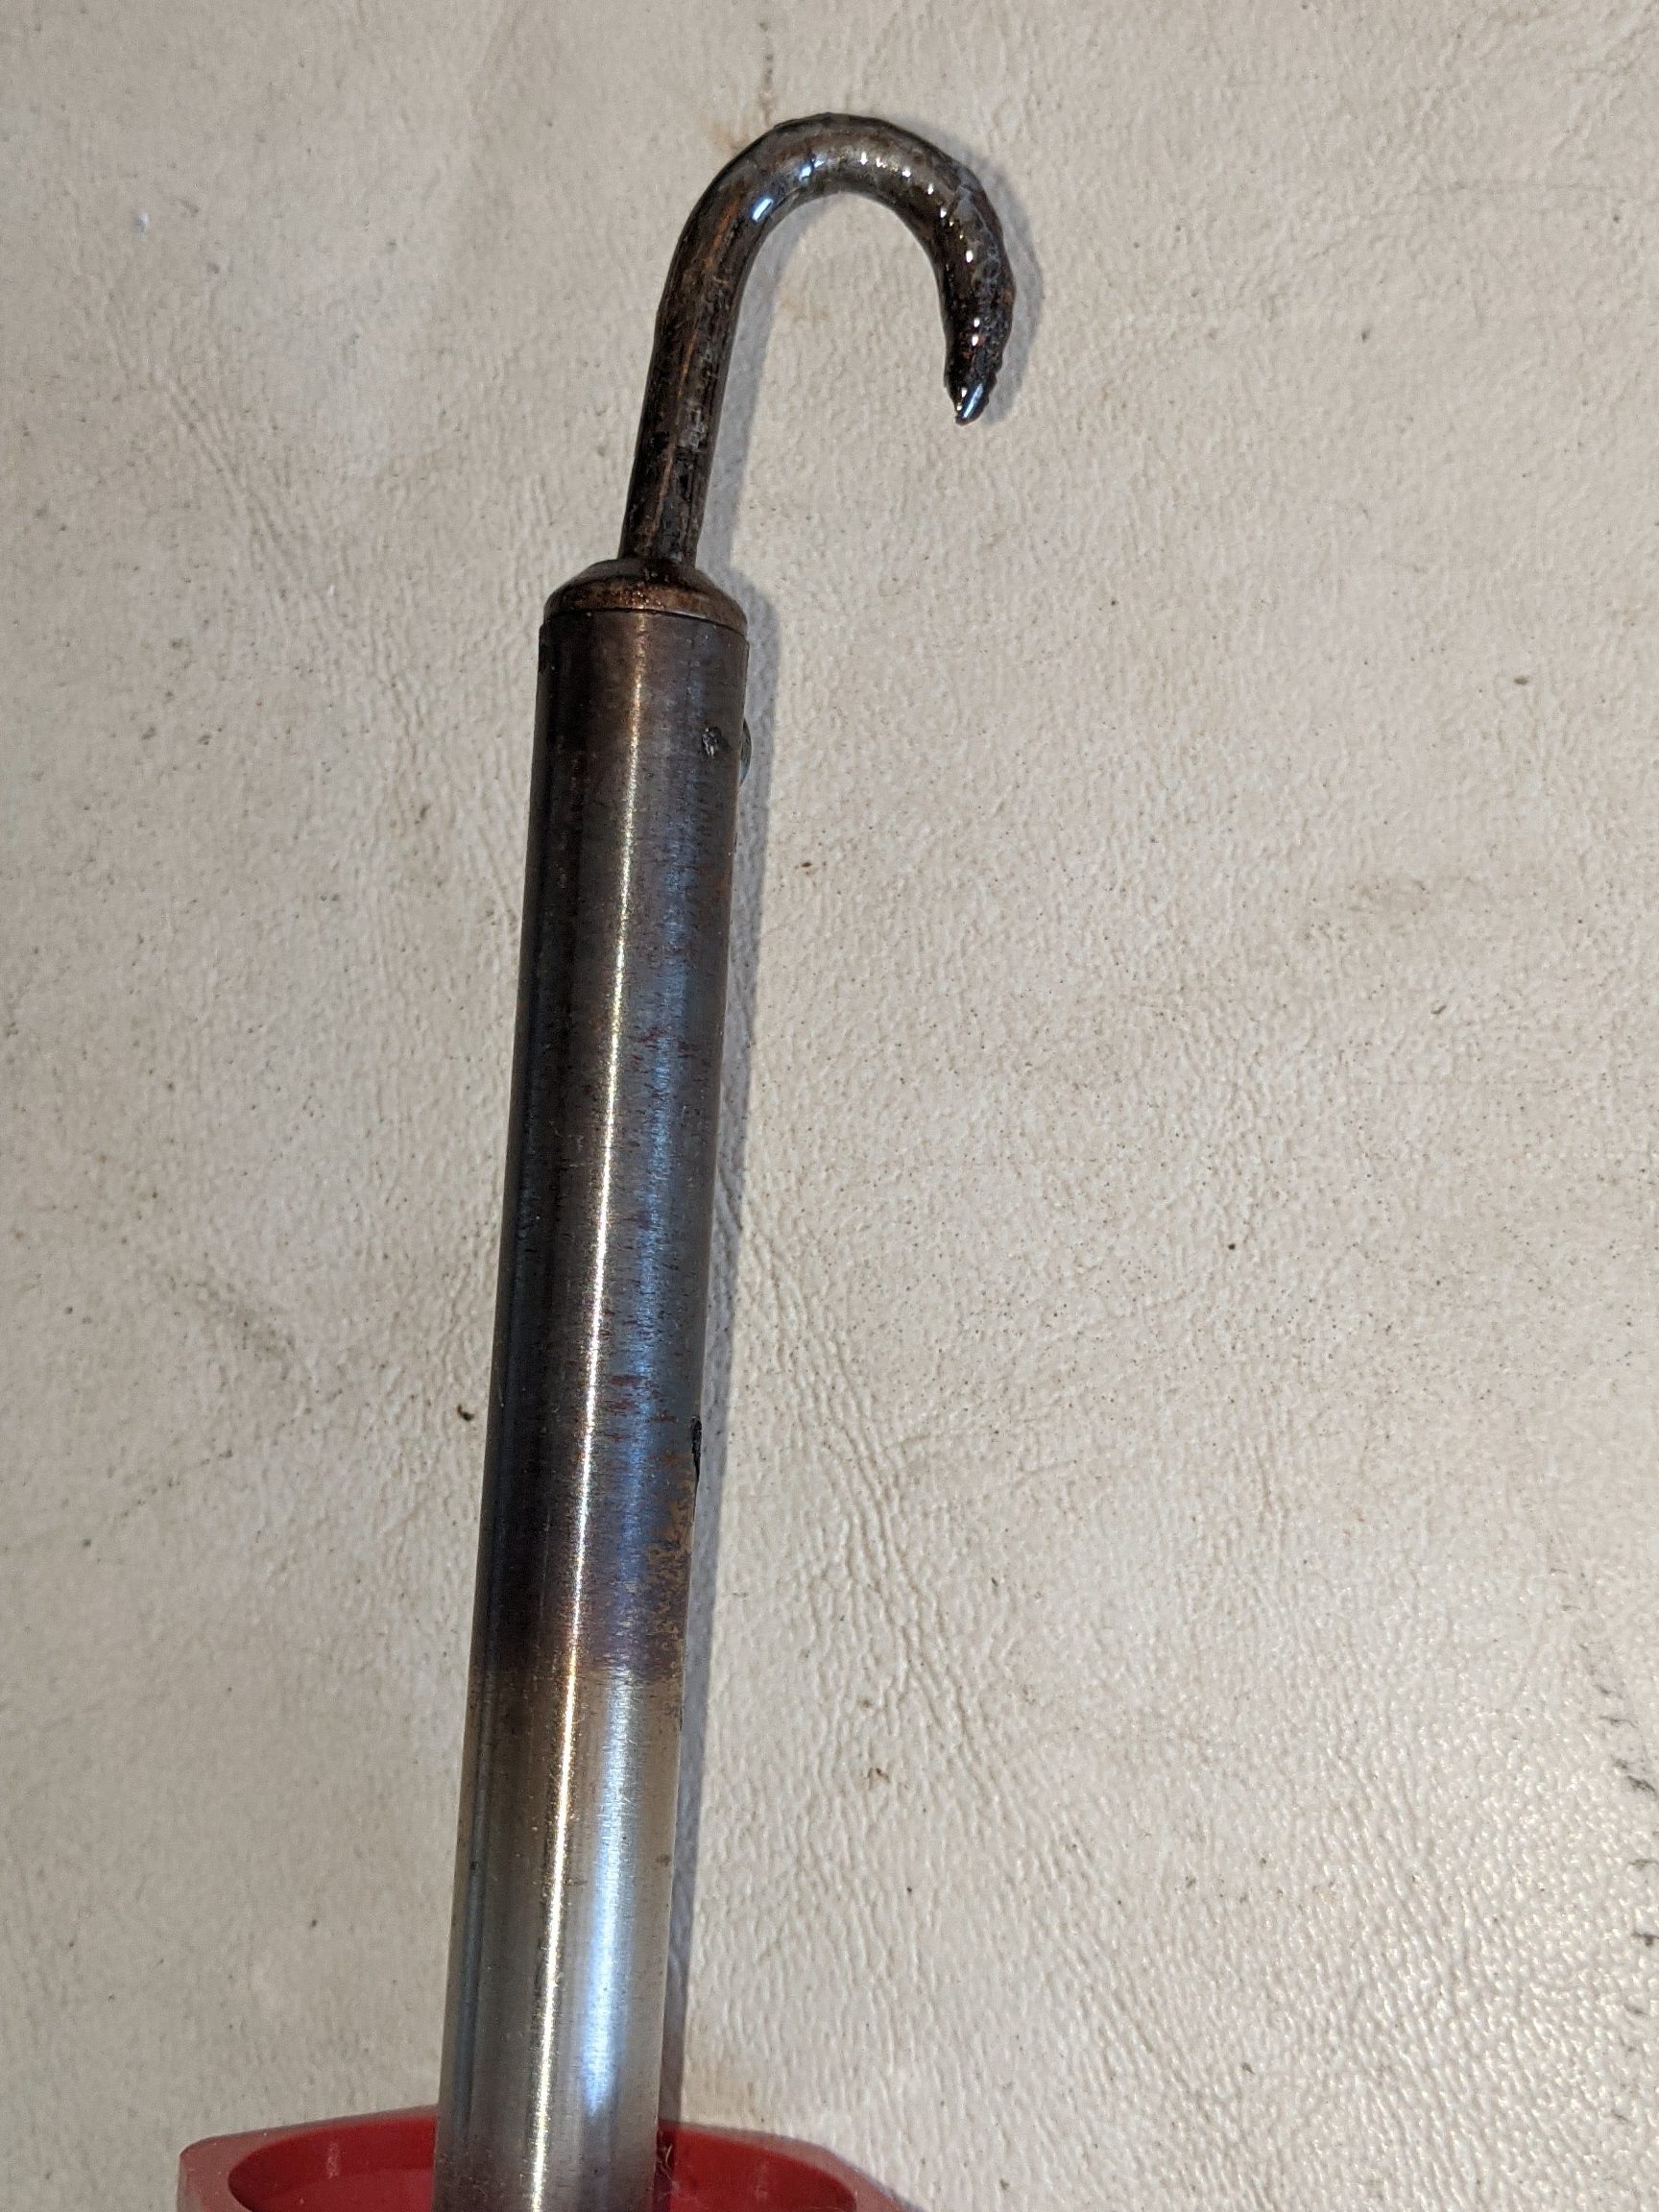
InSoFast recommends a purpose-built electric hot knife foam cutter, like the one pictured above. They come with different sized cutting “blades” for making different holes like for a square/rectangular electrical junction box or curved drain pipe. In our case, just for the water lines, we used an old soldering iron where we heated the tip and then bent it in the shape of a hook.
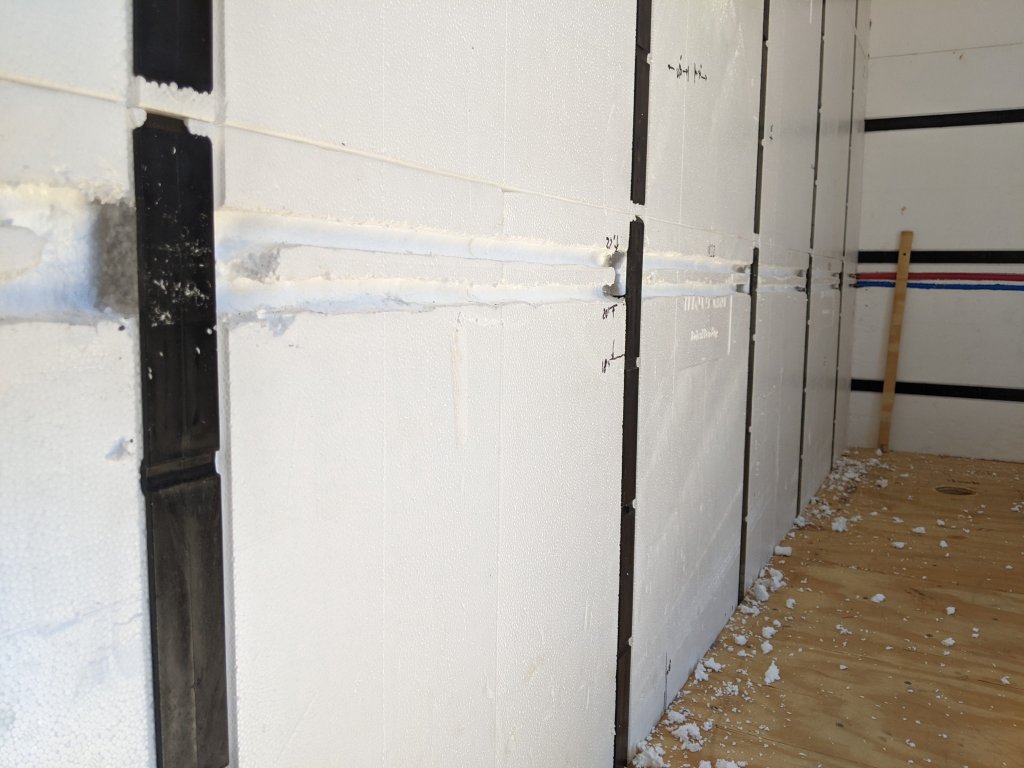
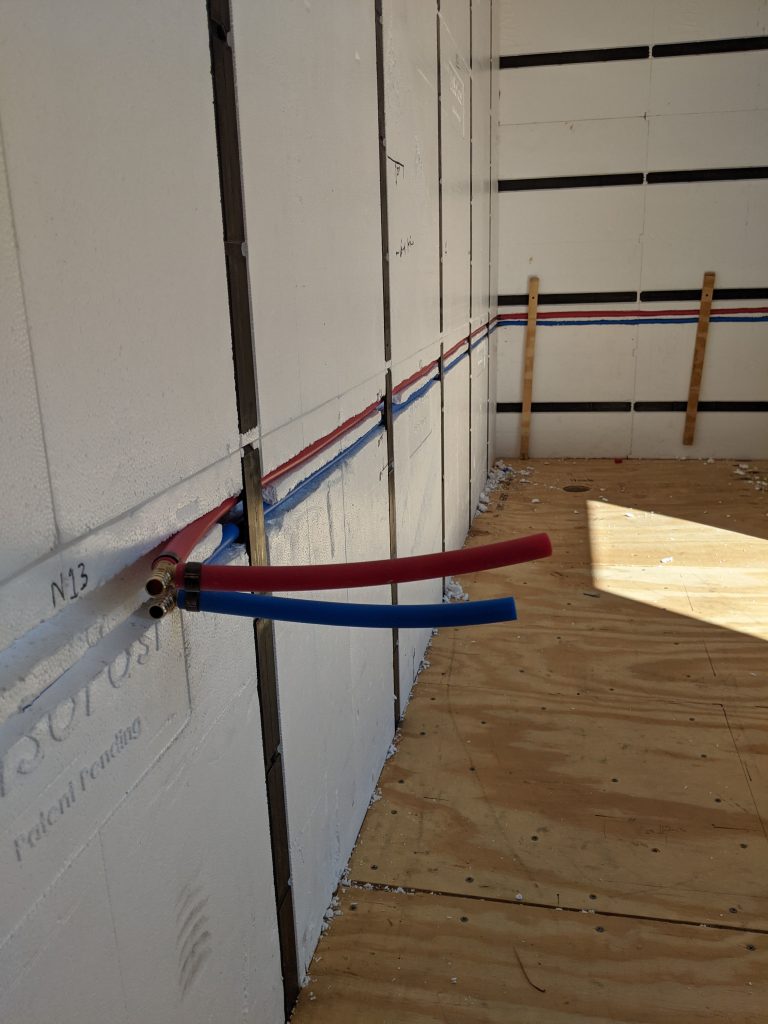
Using an exacto knife and a straight edge we cut the top of the trench line first. Then plunge the hot iron, hook up, to the desired depth and dragged it along the tape or pencil line created earlier. It’s slow going but you’ll get the hang of it pretty quick. When you reach the end of the line, pull the iron out and the cut-out can be easily removed with your fingers or needle nose pliers. Remove the foam from behind the studs and be sure to check that your lines can pass straight through before you run each length. Use a scrap piece of PEX to check these pass-thrus.
Dry fit all of your lines for each length before crimping ANY elbow or T-connectors.
And be sure to leave a little extra at the end so you can cut them to the right length only after you have your manifold installed. Screwing a few temporary scrap pieces of wood, that you can swing up and then back down, will help keep your piping from springing out of the channels. Pex-B isn’t as flexible as Pex-A so these boards keep things in place until you’re ready to secure the lines permanently.
Speaking of laying things out…
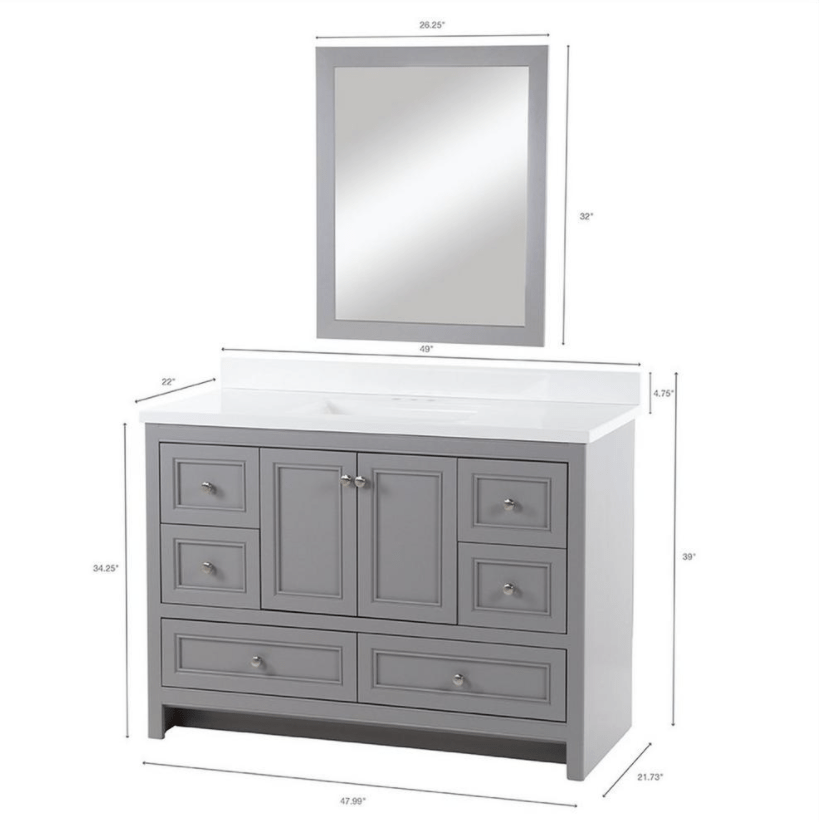
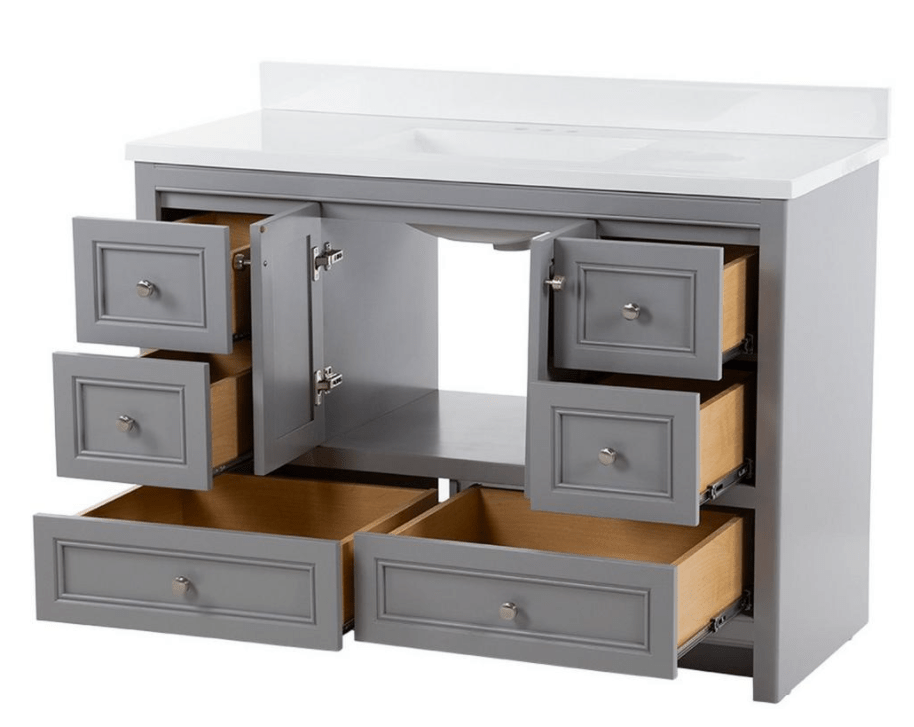
Draw outlines on the floors and walls where all your fixtures and cabinets are going. This will go a long way towards making sure your supply, drain, and electrical runs are positioned correctly. In our case, we knew most 48″ vanities are 21″ to 24″ in depth and 35″ tall, also known as “comfort height”, so we drew lines on the floor and wall and started shopping for deals.
After keeping an eye out for deals we found one that included the sink, the counter and back splash, and even a mirror. And the dimensions were perfect too.
Now that we know the internal structure we can install our t-connectors and quarter turn faucet valves in our Pex run.
The ManaBloc MiniBloc Manifold has arrived! And not a moment too soon.
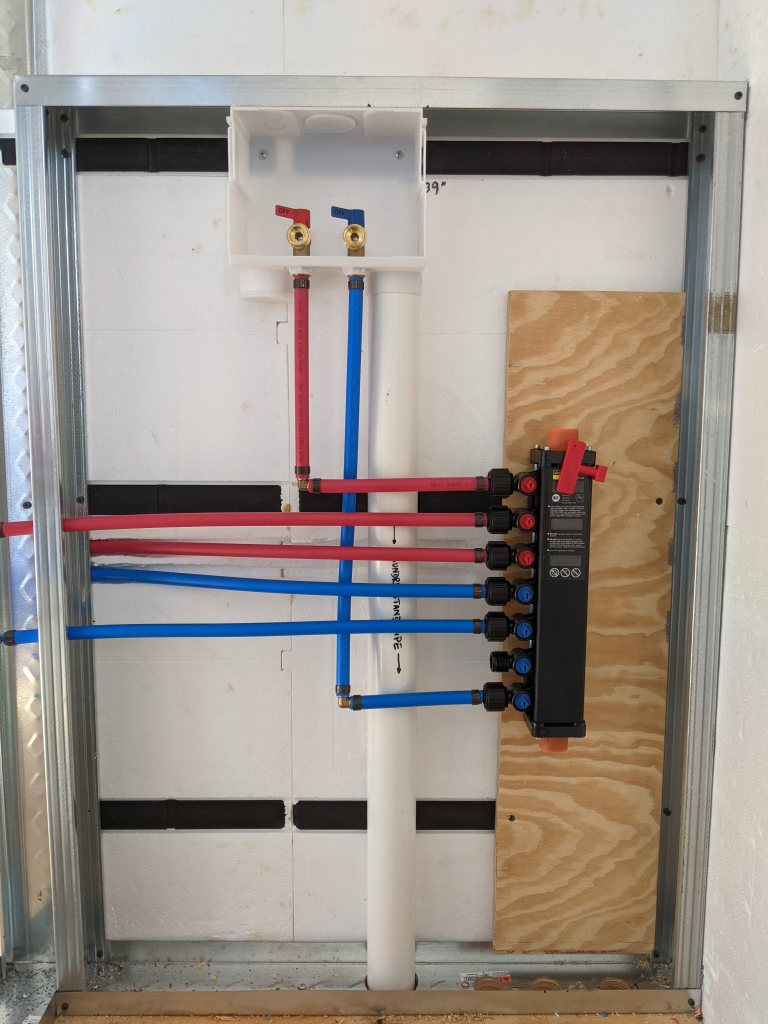
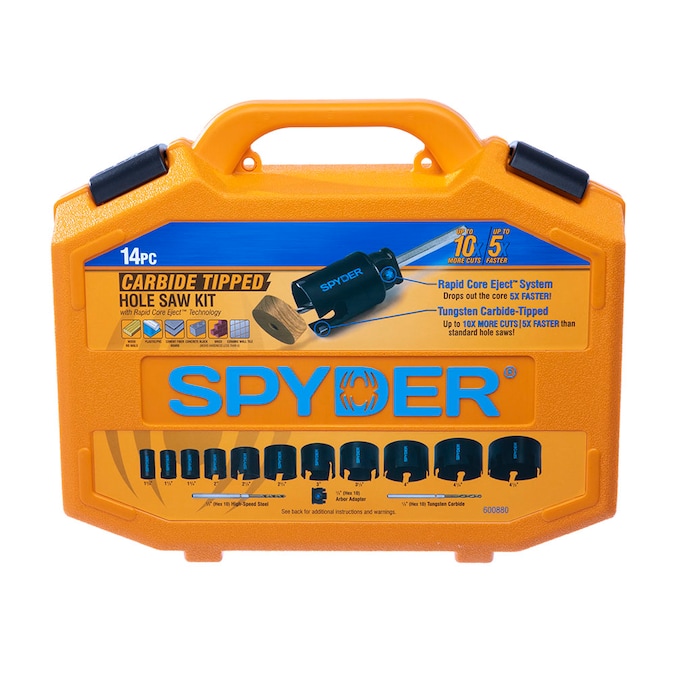
We’ll need three holes in the floor (hot, cold, & electrical for the on-demand propane HW Heater) aligned in such a way so they feed straight up to the manifold. Having a good hole saw kit REALLY helps too. Don’t go cheap on this tool! You’ll use it more than you realize. And spring for the carbide bit version. You’ll thank me later. Spyder and Milwaukee make good kits.
Don’t forget to Dry Fit!
As always, dry fit all of your pipe and connectors before final assembly. Then wrap them insulation as needed.
VERY IMPORTANT: One of the largest negatives of using PEX is it’s sensitivity to UV light. After just a month or two in direct sunlight it will become very brittle. So, if you plan on using it where it even might get exposure to the sun, consider painting it with a UV resistant paint or clear spray. Amazon sells “Krylon with Fusion for Plastic”, a paint designed specifically to bond with most types of plastic.
Also, manufacturers warn against using a petroleum-based paint, recommending only 100% acrylic latex. Acrylic will block UV and it will expand and contract with temperature changes.
Some Appliances and Fixtures should get Home runs while others will do with Trunk and branch. Your clothes washer and shower are good candidates for getting their own runs, for obvious reasons, like maintenance or when/if repairs are necessary and you don’t want to bring down the whole house.
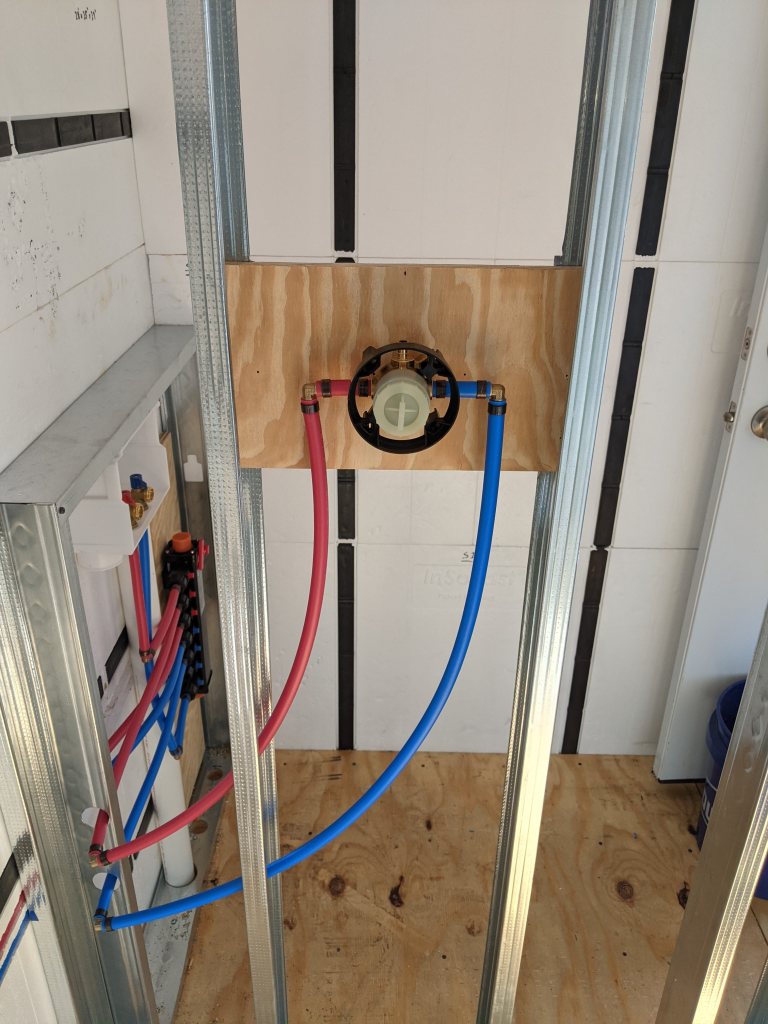
On to the Shower
In our case, we opted for the Moen M-core valve system where the valve body is sold separately from the rest of the system, including the handle(s), fixtures, and even the valve cartridge which ports the water based on the other hardware chosen.
In short, by choosing the “empty” valve body based on installation requirements, like how we want to connect it with crimped pex piping, we could put off the lengthy process of the more aesthetic shopping until later. You get what you pay for though, Moen isn’t cheap. But at least you have many functional and design options at your disposal later.
NOTE: Don’t forget to purchase (or create) grommets for strain or abrasion relief where the PEX goes thru your metal (or even wood) studs. That metal is sharp!
Well, that’s all that’s fit to print this month. We’ll keep running PEX and installing fixtures as we complete each room. The tougher items like the Toilet and Shower come next as we get this container more and more functional.
NEXT MONTH
Installing the Shower, the Vanity, the Toilet…
and Starting the Electrical!!!!
See y’all next month!
