Water, Supply & Drainage
Water Supply
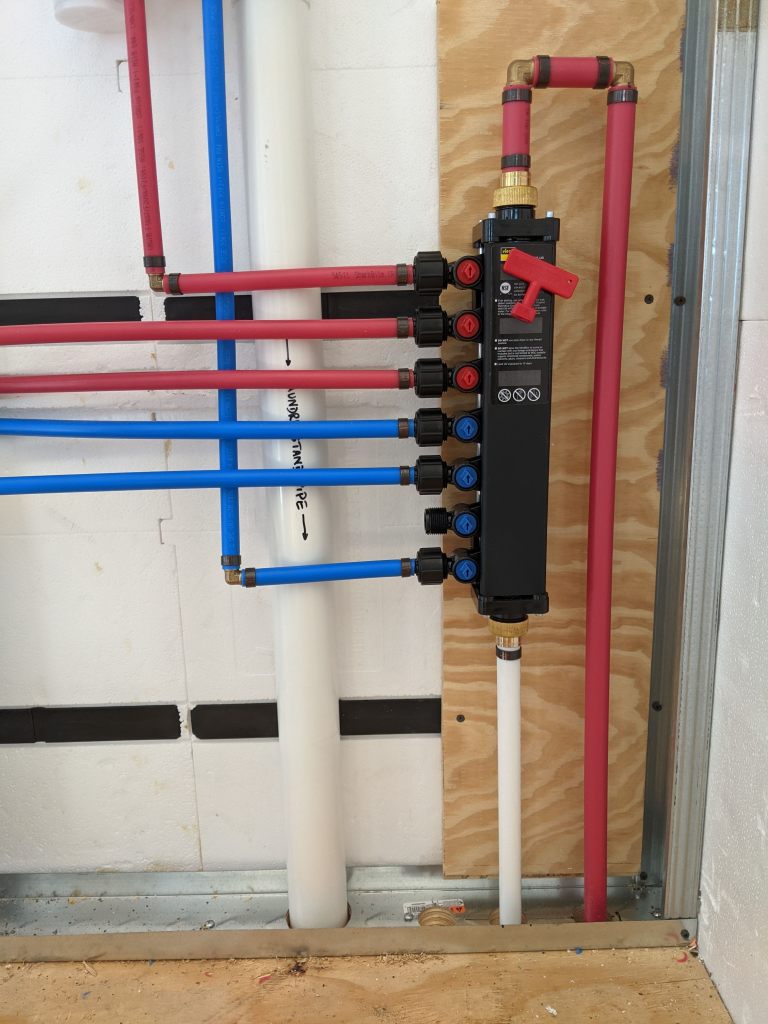
Testing to the Manifold
A thorough test should be done in stages. to the manifold, on each home run, on each branch and twig, etc. For now we’ll start with checking if the manifold leaks. Cold side first, since we don’t have our hot water heater yet.
A temporary setup out side and we can begin our test. Later we’ll need to fabricate the structure that will hold and protect the piping and the water heater.
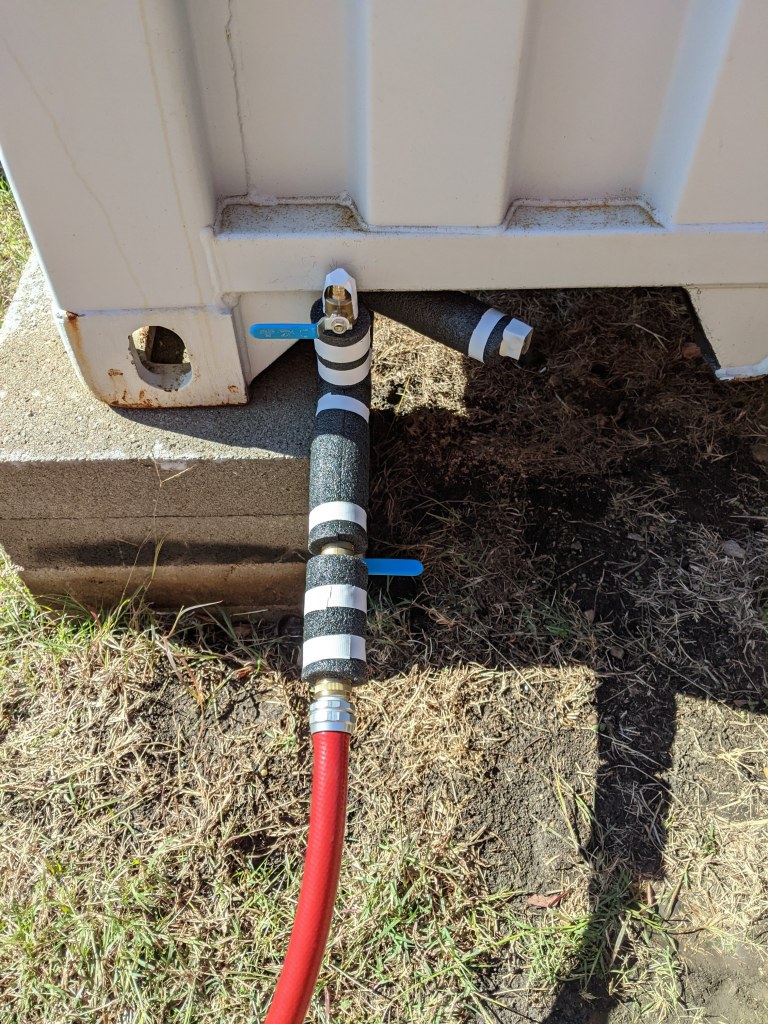
Notice the insulation around the PEX to protect from UV rays?
To the Fixtures
Once we’ve verified water supply (with no leaks) to the manifold we can complete each home run and test each of those too. At least for the cold side. Once the water heater is installed, we can test the hot sides.
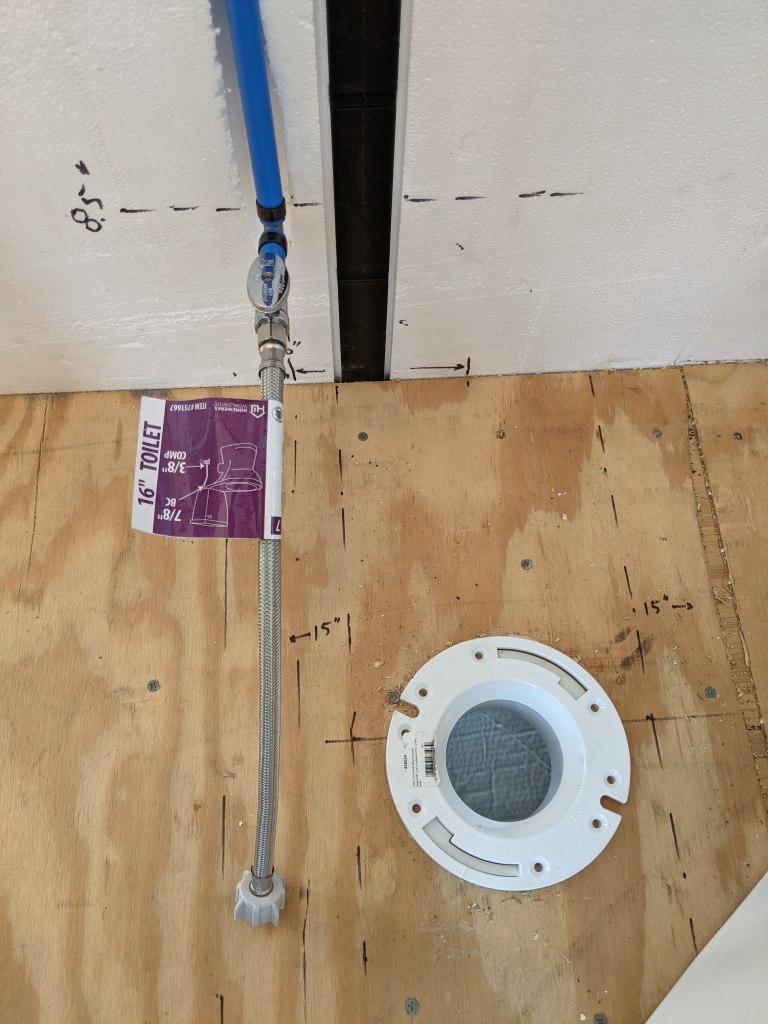
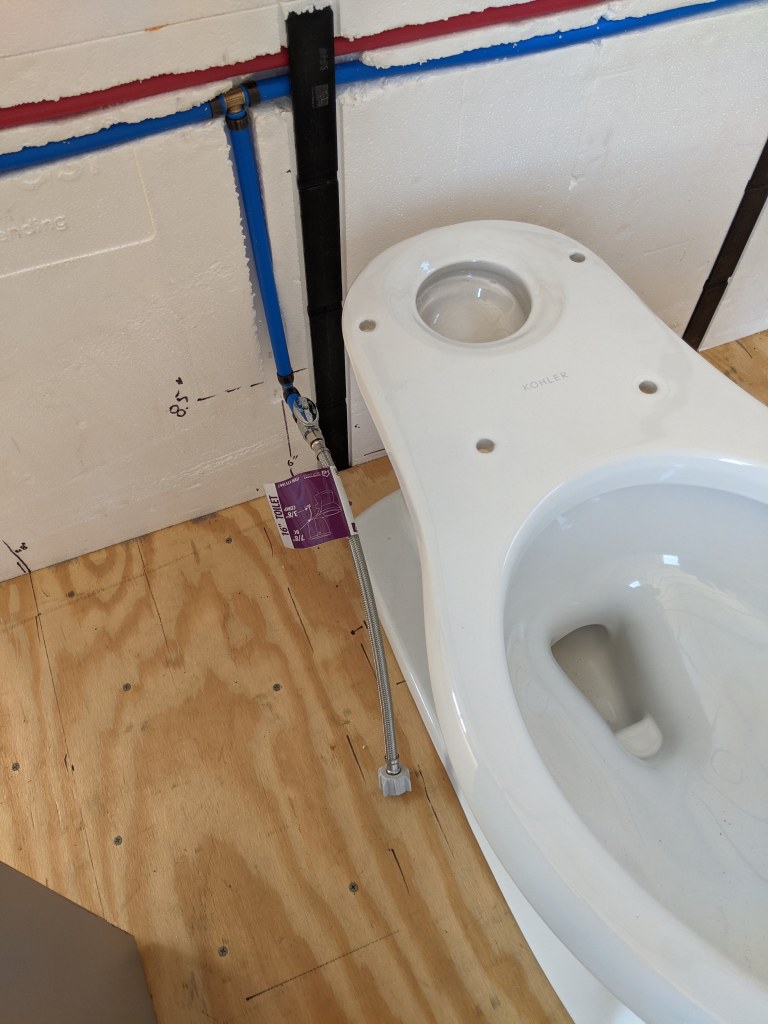
To the Toilet Valve
To the Bathroom Sink Valves
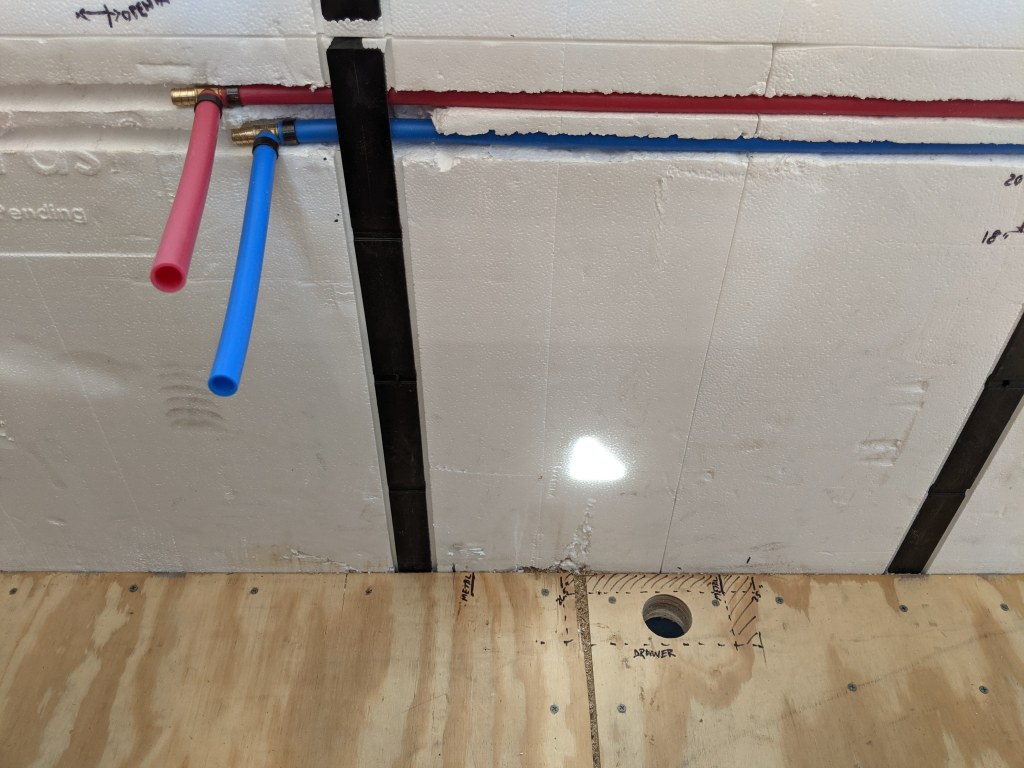
Continuing the Starboard side “branch” and “twig” run. You may notice the cleaner cuts? The curled soldering iron is a cheap solution but having a real cutting/hot knife makes it go quicker AND cleaner.

Lessons Learned
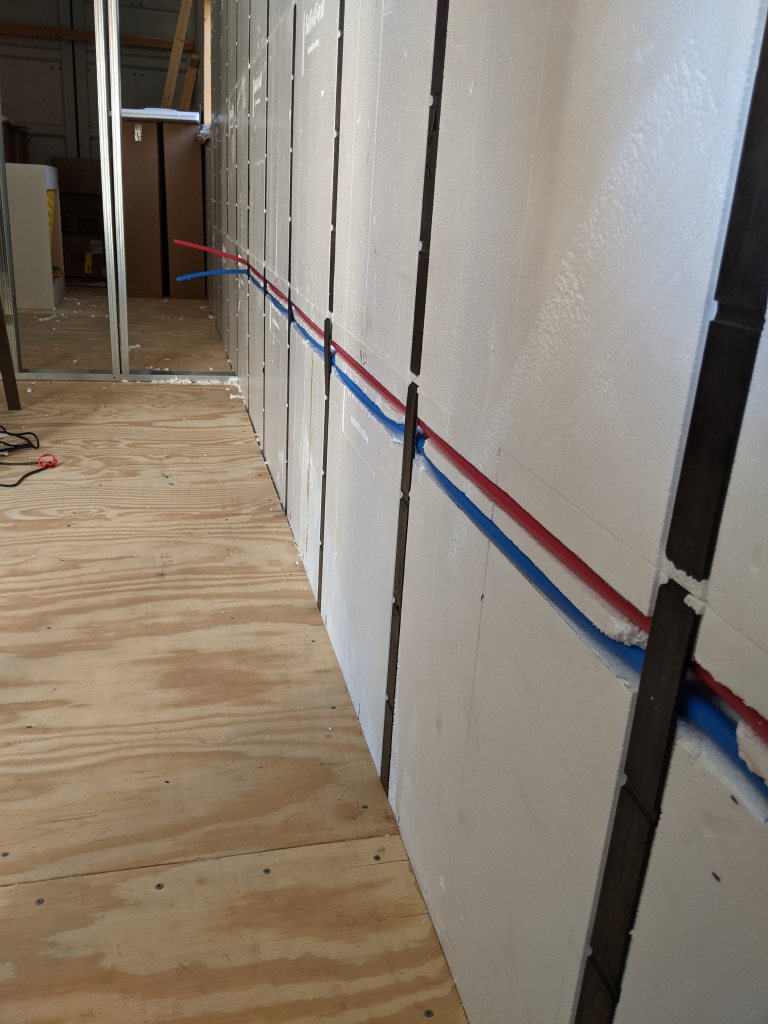
Pulling lengths of Pex through those plastic “studs” in the InSoFast was NOT an easy task. And once you have 3 to 4 sections of Pex in the wall you can’t just yank on one end and it slides right along. Ney Ney. You have to “inch-worm” two sections of slack down the wall, and then go back to the supply end and do it again, and again, and again. We almost crimped (dented) the Pex once or twice using this technique. The lines tend to pinch at the studs because it’s not a straight thru and having both lines go through one hole in the stud is just too tight.
If We Had to Do it Again…and We Will
Next time, we’re going to create a deeper and wider trench for each line and only run one Pex tube through each stud hole. Sure it will be a little loose but that’s what Gorilla Tape is for.
To the Refrigerator Ice Maker line and the Kitchen Sink


Yes, that’s two hot line valves. The dishwasher gets its own hot water line.
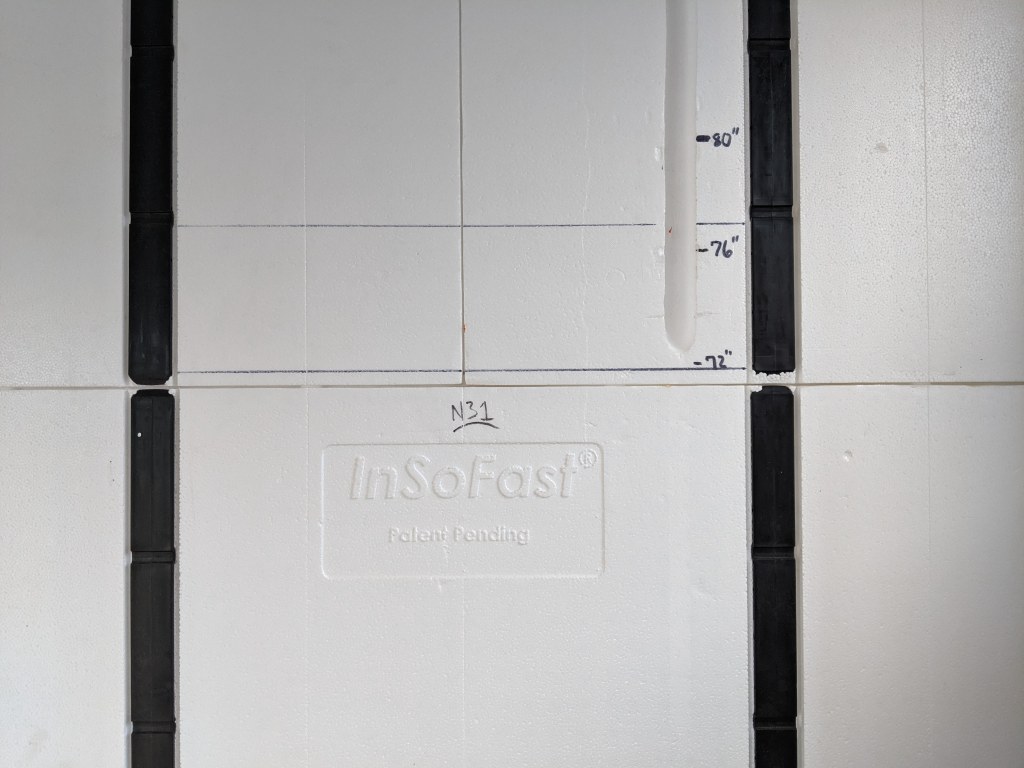
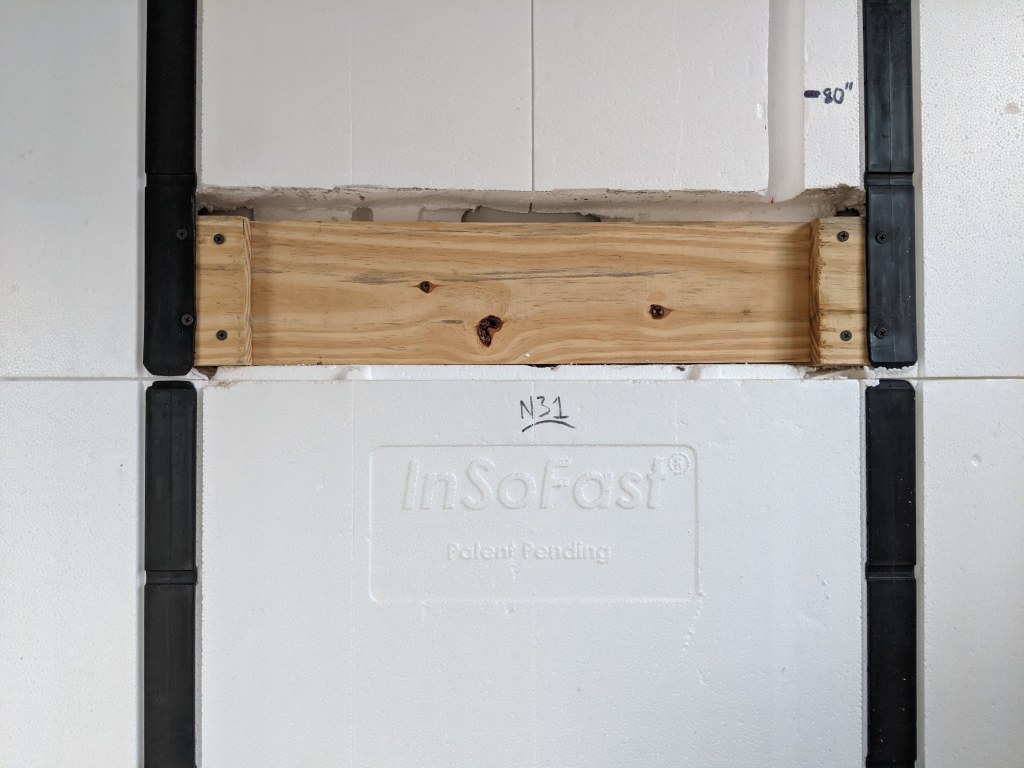
To the Shower Valve(s)
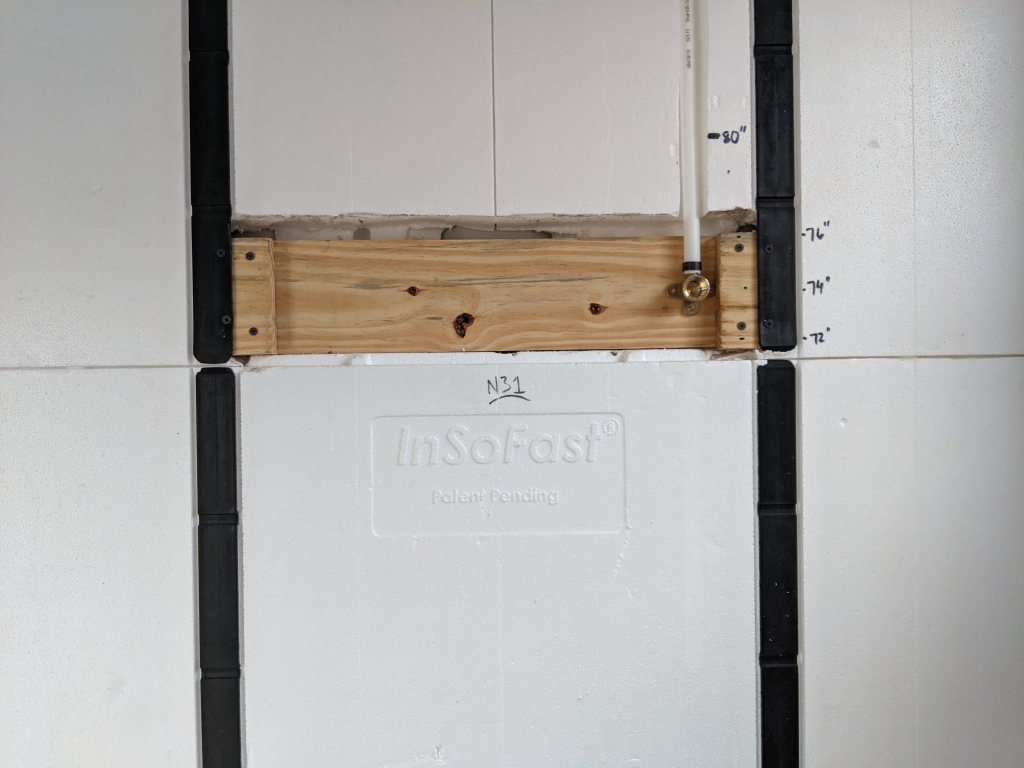
Standard height for a shower Arm pipe is approximately 80″ off the bathroom floor. My wife is a little short and doesn’t want to stand on her tip-toes to get the hand held shower head off the hook. So we compromised on 74″.
If this were a stick-built house with standard wall depths I’d just stick a 2×4 between the studs and mount my hardware on that. In this case I had to create a cavity for this structural component and shallow enough to make it flush with the wall without removing the insulation all the way to the outer metal wall.
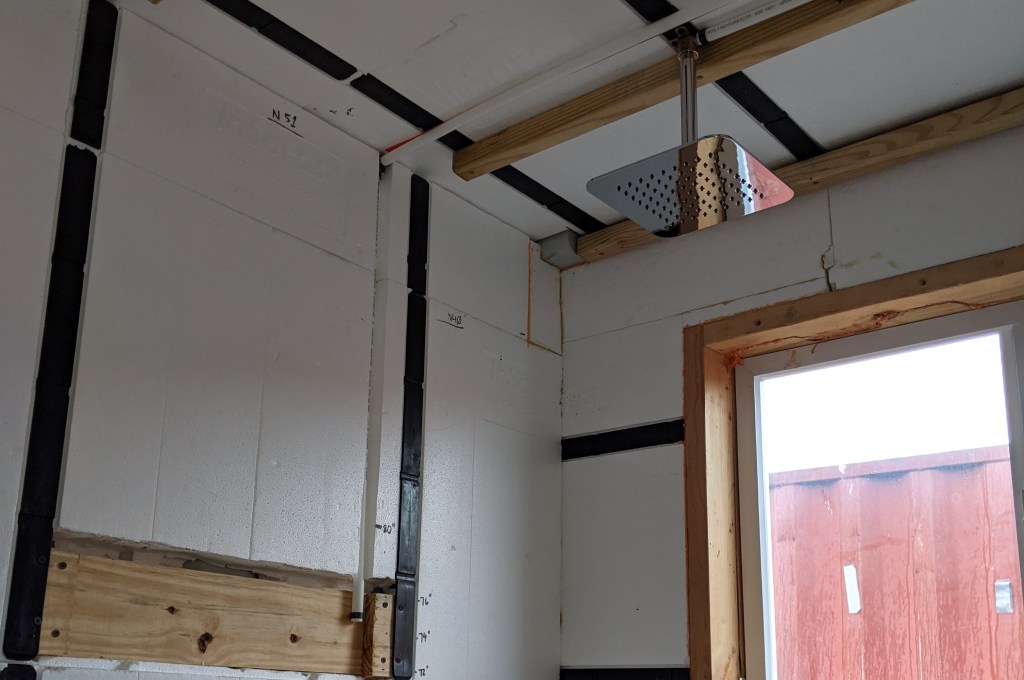
Besides a new piece of closed-cell foam, I’ll need to squirt some insulating foam in the cracks so we won’t have ANY exposed metal. Crimp on the Pex and screw the female elbow fixture to the wood.
Once everything has been leak tested and the rain shower head idea is finalized I’ll insulate everything and put those pics up too. In the meantime, here’s how everything is currently. I have a feeling I’m going to be changing it because we won’t want to have both running at the same time. Maybe a 2-way valve before the main shower head arm and a return line that goes back up to the rain head? Who knows.
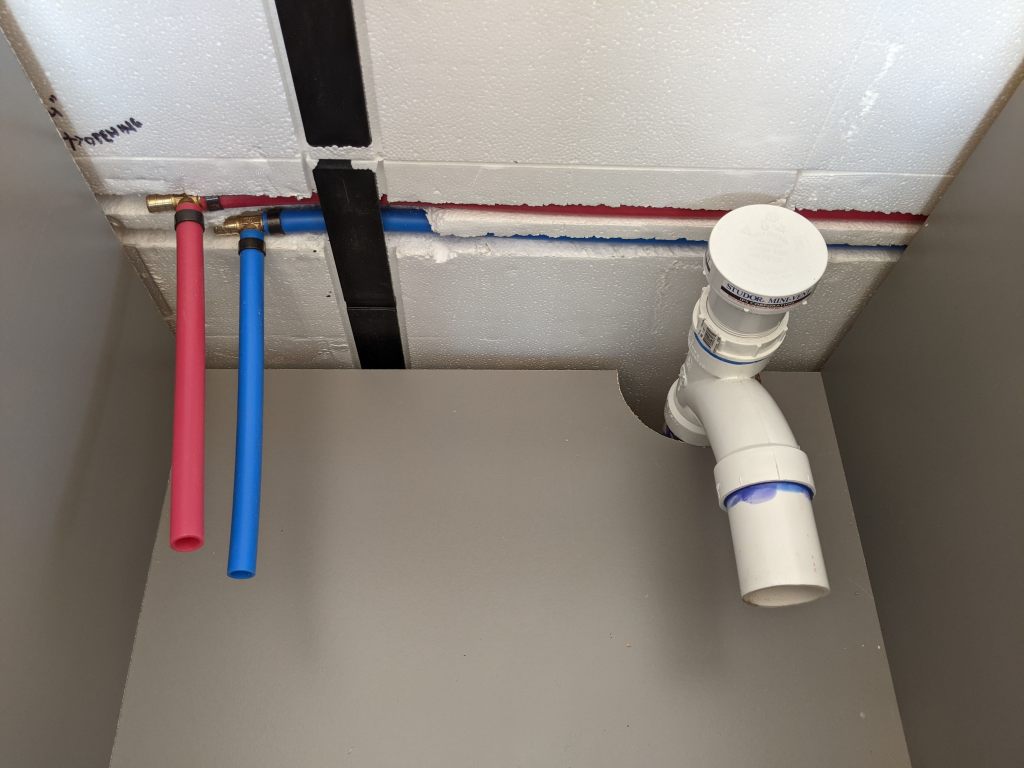
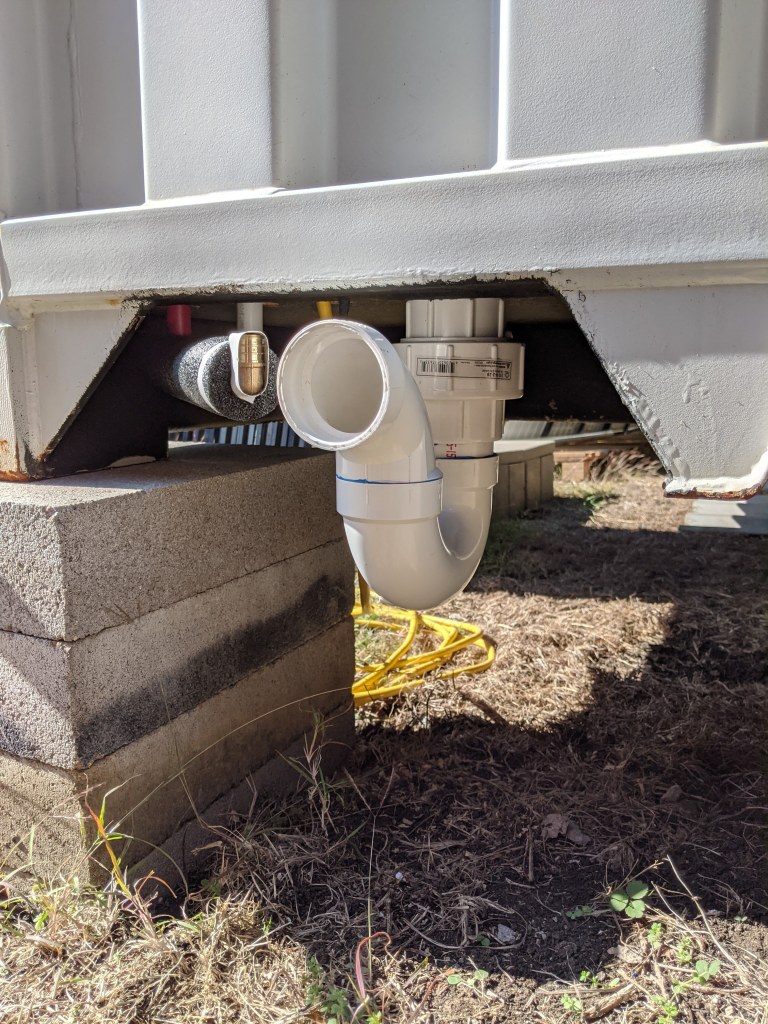
To the Washing Machine Supply (and Drainage)
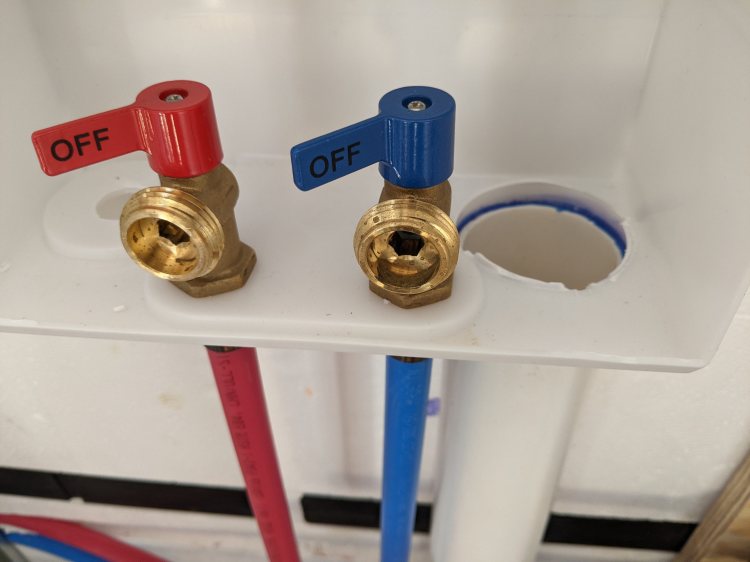
Notice the drainage pipe union joint is above the bottom of the container?
All connections will be like this.
Drainage Piping
Bathroom Sink Drainage Piping
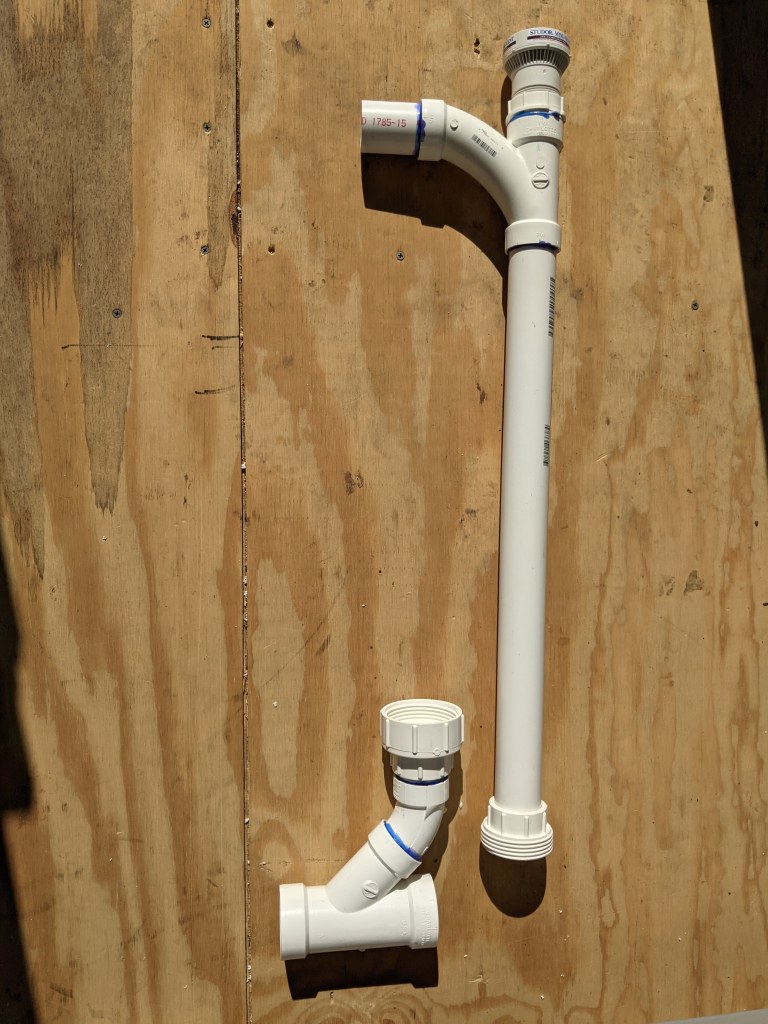
Word of the Day (Project) is “modular”. All external connections, including drainage pipe, must be able to be disconnected so when the container is placed on a flatbed trailer, these connections won’t get snapped off.

Code allows for an AAV (Air Admittance Valve) instead of a vertical vent pipe that goes all the way up to the roof. As long as we have good air flow into our “air-tight” container, these are allowed. Here we used a Studor Mini-Vent.
Shower Drainage Piping
Same goes for the shower drain pipe. Union joint above the P-trap.


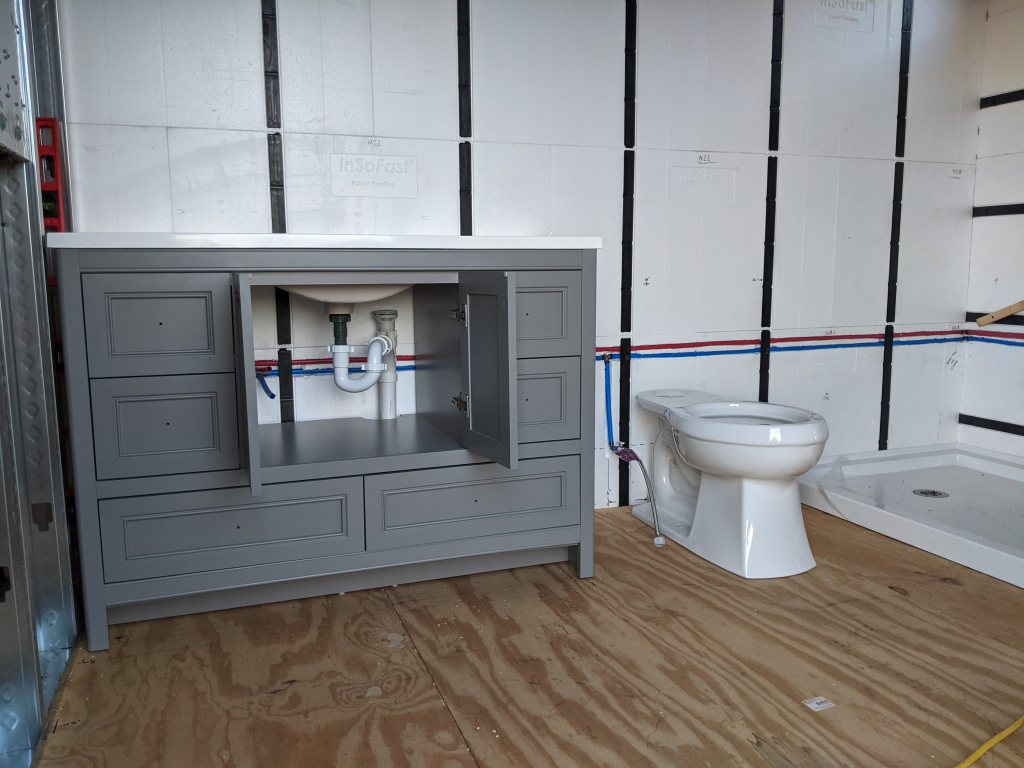
Dry Fit of the bathroom so far…
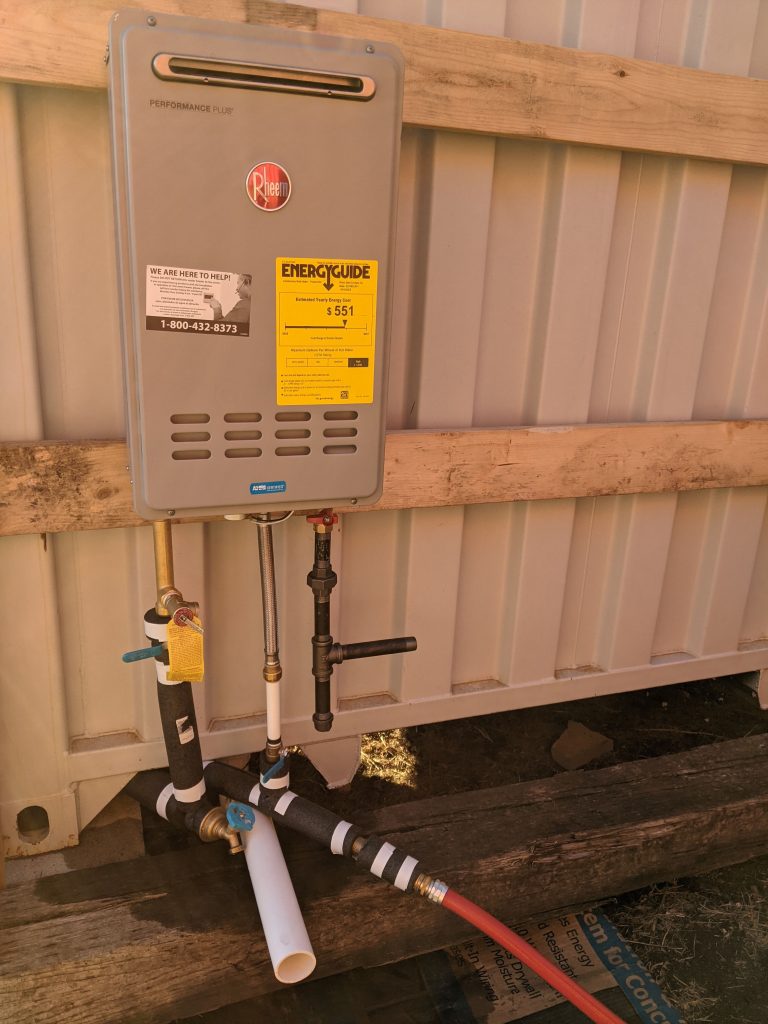
Getting Started on the Water Heater
For now, during testing of this prototype container, we’ve fabricated a wooden structure to mount the hot water heater and some of the solar panel equipment. The final design is made of metal and will include a structure/enclosure we’re affectionately calling “The Container Back-Pack”.
The CBP is modular, can be assembled by one person, mounts securely to the container without welding, and protects/hides all of your piping and equipment from the elements…even though it’s all rated for outdoor use. The CBP still provides adequate, yet separate, ventilation for the propane water heater, the solar inverter charger, and all of the supporting battery equipment like the BMS, or Battery Management System, hardware. You’ll never guess where the battery is going… 😉
Stay Tuned, things are going to get wrapped up quickly.
See you next month!
